This is Our Process
Take a look into the different stages of our design process. From the first design sprint to the final, see how the peices come together as we go from ideation to the implementation of Olin's Best SmartWatch Ever.
Sprint 1 - November 4, 2025
Our first sprint review focused on determining the scope of our project, by first identifying what each team member wanted to focus on and learn, and by testing a small piece of functionality that would serve as a minimum viable product (MVP). During Sprint 1, we established all of the technologies, materials, and steps required to integrate the mechanical, electrical, and software components of our project.
We realized upon our first couple of meetings that our team was more rounded towards mechanical, software, and electrical that is more rooted in biological engineering so we wanted to incorporate/consider several ways in which we could bring more biological aspects into a mechanically and software dense project. This allowed for each team member to meet their goals, and we established a structured integration process for the project.
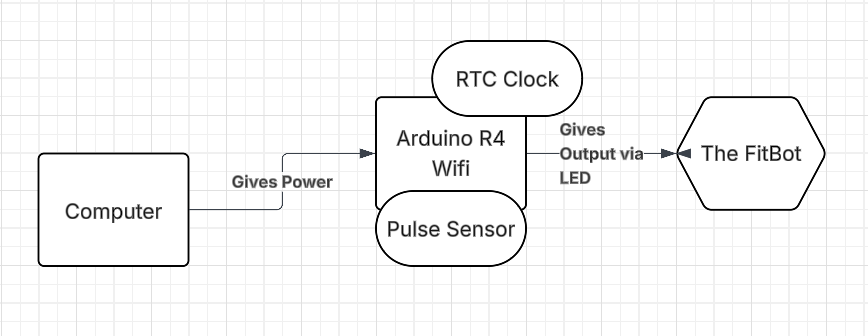
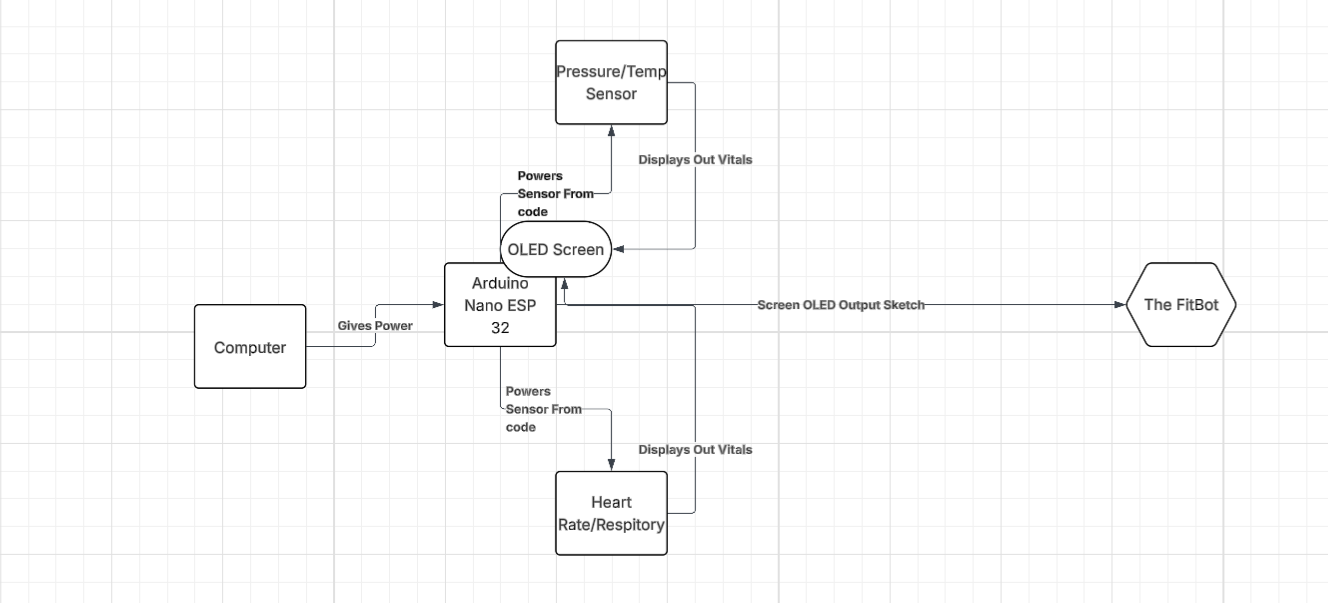
In terms of communication across the MVP, the computer powers the Arduino, which then connects to WiFi to pull RTC data. For this sprint, we chose the pulse sensor as our MVP sensor, and the outputs of both the time and pulse data are displayed on the LED matrix pins.
For the electric side of the project we first bought our pulse sensor along with other sensors from Amazon and quickly realized that they were faulty, which caused there to be delays and troubleshooting. So we decided to get our materials from more reliable sources like Adafruit and Digikey, as both entailed detailed instructions, starter manuals, and clear explanations; making it easier for us to implement and understand the electrical components in our device.
On the mechanical side of the project, we determined the best method for hosting the watch strap system and explored different ways to integrate it effectively. Since this was our MVP, we used a clip strap and the plastic holder from the Arduino to make sure that the watch was hosted.
On the software side of things, we successfully integrated the RTC clock code using the Arduino Uno R4 WiFi and LED matrix pins. The clock currently operates on a 24-hour format rather than AM/PM, but it effectively demonstrates time tracking functionality and communicates correctly with our electronics setup.

First Iteration of The FitBot
Sprint 2 - November 18, 2025
For our second sprint review, we wanted to have a full set idea on an integrated prototype that has a configured screen, housing for components, and control panel. The objective of this sprint is to have a functional pulse and time-tracking features wrapped in a user-friendly format. Due to the delays with improper materials and delivery problems, our team could not fulfill the full integration for this sprint. However, we have tested each individual component and saw that each one worked and is ready for the final housing assembly.
For the teaming dynamic our team split up into 3 different subteams based on our interests, additionally our team used Ad hoc/Scrambling management styling where each team member will primarily manage themselves from their respective sub-team and coordinate through text updates and scheduled meetings.
On the mechanical side of things, we were able to design the housing unit in Onshape to establish the watch's final look and feel. The model will be made with 3D printed parts to validate the physical design and dimensions. For the next sprint review the focus will shift toward integrating the electrical components, specifically addressing wiring management and heat dissipation to ensure user comfort and safety.

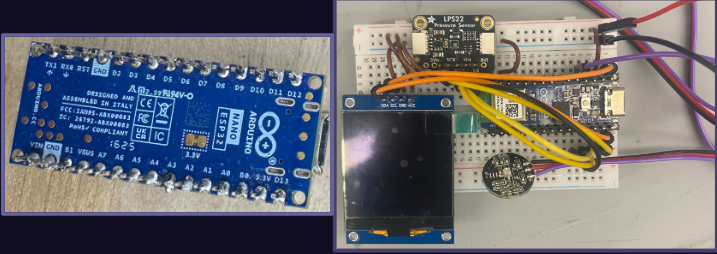
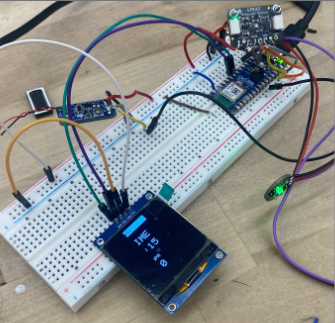
On the electrical side, we decided to use an Arduino Nano ESP32 as it fits the project's strict constraints: a size under 2.3 inches, a 3.3V power center, integrated battery port with a charger, and RTC connection. We have successfully created a working circuit communication for internal temperature and pulse sensors, in addition to having integrated a digital screen into the circuit that is capable of displaying real-time sensor data. This full integration is for the breadboard but for the next sprint it will be on the solder board.
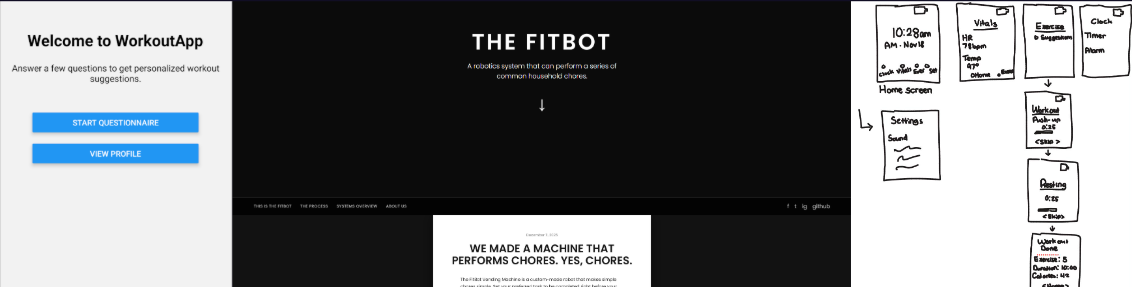
On software, we developed the basic integration code to handle the interaction between the sensors and the screen. We have mapped out a UI flow that includes a home screen (with clock functions), vitals (Heart Rate, Temperature, and Pressure), and exercise suggestions. We also worked on the first version of a companion Fitness App that will run with the watch, which includes a questionnaire to provide personalized workout suggestions and push those suggestions under the exercise section. And we also started the first version of documentation for the project website.
Sprint 3 - December 9, 2025
For this sprint we focused on the integration process, by making the watch to have communication between the sensors, screen, microcontroller, and have proper CAD models. However, due to the delays from the earlier sprints, we focused this sprint primarily on testing out individual components rather than the whole project integration.
Mechanical
The mechanical design evolved through several stages of fidelity to get to the final wearable product. Initially, low-fidelity work focused on user design and basic component connections. In the final high-fidelity stage, we optimized the component positions within the 3D-printed housing to achieve the general shape of a watch while keeping the device small and comfortable. A major mechanical goal was the development of a comfortable, movable strap; which can be a feature intended to give the Fitbot a competitive edge over established fitness trackers. To finalize the build, we took precise measurements of all internal hardware to ensure the CAD housing was perfectly scaled for integration. This took several attempts to measure due to the small sizing of our product.
Electrical
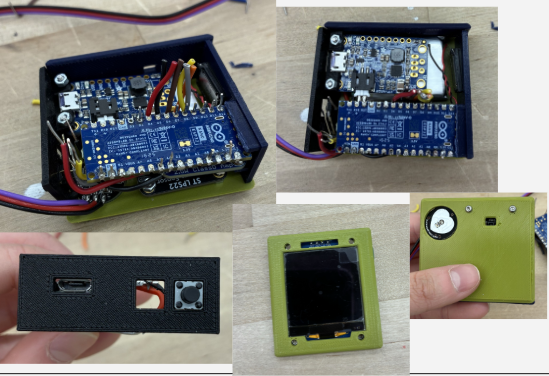
The electrical system went through significant development as it moved from breadboard testing to a finalized integrated circuit. High-fidelity improvements included incorporating a voltage regulator at the battery port to protect the Arduino Nano ESP-32 and adding a manual power switch to the system. To fit everything inside the 3D-printed housing of our watch, we used soldered extension wires, carefully arranging them to ensure they did not cross, take up unnecessary space, and provide safety. Another update involved rewiring the OLED screen connections to bypass the need for an internal clock system, allowing the display to rely solely on triggers from other pins. We also finalized the power source by selecting a 500 mAh Li-Po battery that was compatible with our specific charging port.
Software
On the software side of things, the Arduino output evolved from basic sketches to a fully integrated UI that manages time, vitals, and workouts. Because the pressure sensor was unreliable, we pivoted to develop a custom software function that calculates respiratory rate based on pulse sensor data. The final software environment was managed through GitHub, where the main integration_workout.ino file was documented. While the workout app was completed, communication issues between the app and the watch meant the final version relied on preloaded workouts rather than real-time custom syncing.
The final system was put together for the Final Sprint and then fully integrated for Demo Day.
SPRINT 3 PRESENTATIONOverall Integration
The integration process followed a pipeline that merges subteam contributions. It first began with electrical research (to make sure sensors work as intended) and mechanical component measurement to set the physical layout. Once the components ran as intended on a breadboard and the UI was tested, all parts were combined into the final 3D-printed housing. The resulting system provides users with real-time time functions (AM/PM), heart rate tracking in BPM, and an easy-to-navigate interface accessible via a physical push button.
Second Iteration of The FitBot
Demo Day - December 19, 2025
For Demo Day, we encountered several technical setbacks while finalizing the system. We faced difficulties soldering components due to our limited background in electronics, which was shown when we attempted to reintegrate the LPS sensor. Although the sensor was within our budget and successfully soldered onto the board, it ultimately failed to function. Additionally, the voltage regulator we purchased broke, corrupting the current and forcing us to forego the battery entirely. To ensure our MVP was met for the demonstration, we had to solder the circuit and put our focus to the screen, microcontroller communication, and pulse sensor. This allowed us to successfully run our wanted UI faces Home Screen,Vitals (measuring the pulse), and the Exercises (which were preloaded rather than personalized). We also implemented a speaker system that beeps steadily to indicate changes in BPM and emits a loud high-pitched alert when the user's vitals reach a dangerous range.
Budget
The attached PDF below includes our Bill of Materials