Computational Setup Instructions: SoftDes Spring 2026
- Request an account
- Login and try VS Code
- Configure VS Code
- The course GitHub
- Activate Virtual Environment (to allow Quarto)
- Setting Remotes
- What in the World Did I Just Do?
- Helpful Notes
- Getting Help
This year in SoftDes, you’ll have the option of using Unity, part of the Massachusetts Green High Performance Computing Cluster. Although it’s optional, we recommend using Unity (at least to start!). It’s great for skill-building and will hopefully reduce friction, getting you up and running quickly. This document will introduce you to the system.
Please read the instructions slowly and carefully. If you get stuck, take a little break, come back, and read the instructions carefully again.
Note: Your SoftDes account on Unity will not last forever! It’s just for the semester. Be sure to download any work you want to keep.
Request an account
Please follow the “Olin/UNITY Onboarding Instructions” to request an account. Since you’re enrolled in this class (or a CA), you have permission from someone at Olin. For SoftDes, you’ll want to request an account with pi_softdes26_olin_edu. If you have an account with a different pi already, you’ll still want to request an account with pi_softdes26_olin_edu – we’ve got some special features on that account just for SoftDes (like 288 cores reserved for us during class times, allowing us to skip the queue!).
Login and try VS Code
- After your account is approved (you’ll get an email) go to: https://ood.unity.rc.umass.edu/
- Click the Olin logo (or type “Olin” into the “Search for Organization” box). You should be able to login using your Olin credentials.
- On the top navigation bar, click “Interactive Apps” and then “VS Code”
- You should now see a page with text boxes populated with default values. Unity is a supercomputer, so it’s got a lot of computing power, and it needs to allocate and manage all the user requests it gets. It does this with a program called Slurm. As you gain experience with Unity, you can start asking for specific things you want, like particular processors that are optimized for your code.
- For now, take a look at the “Maximum Job Duration” - this is the amount of time you’ll have to use VS code during your session. Make sure it is what you need for whatever you are doing now, because it’s going to kick you off once that time has passed. Some schedulers prioritize jobs with shorter durations. (The maximum for this is 8 hours, but know that there’s ways to run code continuously for weeks on Unity if needed for projects later on in the semester).
- For “Extra Arguments for Slurm” enter
-A pi_softdes26_olin_edu. This tells Slurm to run VS code in the right directory that has our SoftDes installs. - (Optional) We have a class reservation to use a portion of the Unity cores during Tuesday and Friday class times. This should work automatically (they are “magnetic”) but you can also specify them in “Extra Arguments for Slurm” as
--reservation=softdes26_t(for Tuesday) and--reservation=softdes26_f(for Friday). If you access Unity not in class hours, you might have to wait a minute or two before the session starts. - (Optional) It’s okay to ignore the other arguments for now. If you want to learn about them and change them as desired, check out these help pages: Slurm Documentation and/or HPC Theory
Click the Launch button and wait as the supercomputer to processes your request. When your instance is ready, press the blue Connect to VS Code button at the bottom of the created box to open VS Code. 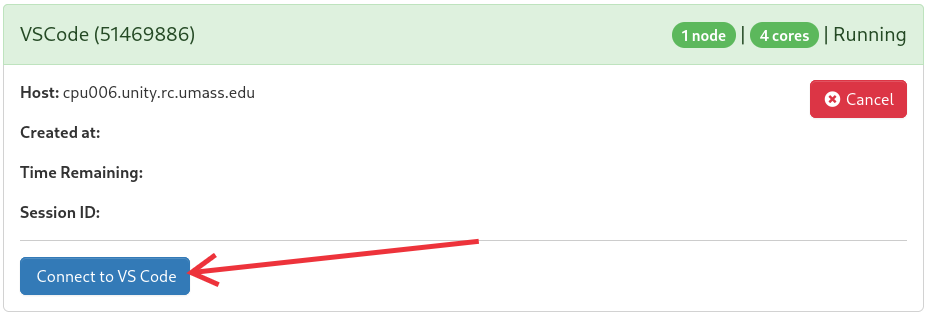
Configure VS Code
Now we’re going to add a couple of bells and whistles to VS Code. You should only have to do this once.
- You might see a window that says “browse popular extensions”, or you can click on the icon on the left side (bottom) that looks like three blocks together with one block offset.
- Search for
ms-python.black-formatterto find “Black Formatter”; a formatter extension and click “install.” - Search for “pylint”; a different formatter extension and click “install.”
- Search for “quarto”; a scientific and technical publishing system and click “install.”
- Search for the “GitHub Pull Requests and Issues” extension shown below and click “install”. Note that this adds a little GitHub icon that looks like the silhouette of a cartoon animal with ears to the left side. You’ll use this later.

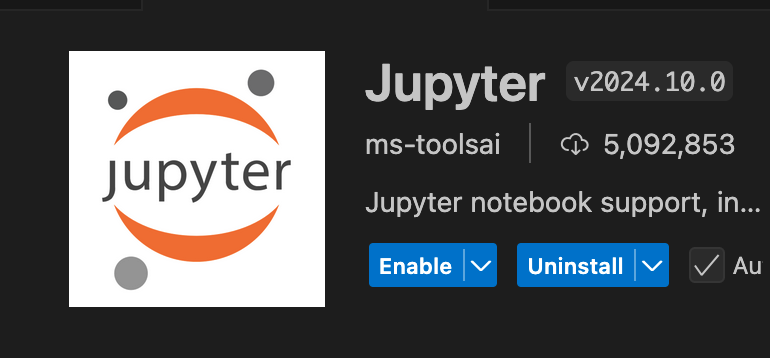
- Search for “Jupyter.” Select the one that is just called “Jupyter” and has >5 million downloads, and click “install.”
-
Enable autoformatting. Click the “hamburger” icon (top left, three horiontal lines)in VS Code -> File -> Preferences -> Settings -> search format -> change Editor: Default Formatter to Black Formatter -> check the box next to Editor: Format on Save
- (Optional) You may have to configure your browser so that it allows VSCode to access your clipboard: this will make things easier later. See instructions here: VS Code Clipboard Access. If you have Firefox, you may have to click on the shield icon to the left of the web address and add
https://ood.unity.rc.umass.eduto the list of exceptions to “Advanced Tracking Protection.”
The course GitHub
Although the course readings have details on GitHub, Unity also has an overview that you may find helpful: Unity Git Guide
- To start, you need to fork the course repository, located at https://github.com/olincollege/softdes-2026-01. You will need to be logged into GitHub to access this repo. At the top right of the page, you should see a button labeled “Fork.” Click it to fork the repo.
- In your fork (not the main course repo), click the green button that says Code. It will open a drop-down menu; make sure HTTPS is selected. Copy the url. It should look like
https://github.com/myGitHubUsername/softdes-2026-01.git. Make sure the url in your browser has your GitHub username. If you seeolincollegeinstead of your GitHub username, do not use it, that is not your fork but rather the main course repo. -
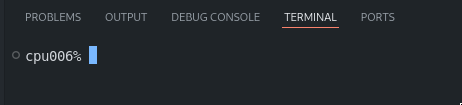
Navigate back to VS Code. We will now open what is called the terminal. In the top right corner, click on the box with the big rectangle on top and the little rectangle on the bottom:

This should open a lower panel, which will have the terminal open by default.
Other options include going to the top right menu → Terminal → New terminal, or the keyboard shortcuts
Ctrl+Shift+CandCtrl+Shift+`Learning to use the terminal is an important skill in computing, and you will learn more about the basics in Reading 0. For now, all you need to know is that we can type commands into the terminal, and run these by pressing enter. - Making sure the terminal is selected, move to the SoftDes working directory by typing the following command and pressing enter:
cd /work/pi_softdes26_olin_edu/Note that on Unity, you don’t want to run software in your home directory. The admins of Unity restrict the computing limits of home directories on purpose! They want you to work in an optimized directory, which for Unity is
/work/. - Create your own softdes directory by typing the following command and pressing enter, replacing the placeholder
[yourdirectory]with your first initial and last name (for example, Frank Olin would create the directoryfolin)mkdir [yourdirectory] - Click on the GitHub (creature with ears) icon on the left side. It will tell you haven’t opened a folder. Open
/work/pi_softdes26_olin_edu/[yourdirectory]where[yourdirectory]is what you created in the previous step. After the page loads, click theYes, I trust the authorsbutton. - If VS Code’s “Welcome” tab is open (the tab name will say
Welcome), clickClone Git Repository. If not, press F1 to open the command palette and find theGit: Cloneoption. - Paste the url that you copied in step 2, then press enter or select the
Clone from URLoption. - When prompted to choose a folder, enter the work directory you created in step 5, which should follow the format
/work/pi_softdes26_olin_edu/[yourdirectory]. - If prompted, follow the instructions in each dialog to connect your GitHub account.
- After VS Code finishes cloning, click the
Openbutton when asked whether to open the cloned repository.
Activate Virtual Environment (to allow Quarto)
Throughout this course, you will be working with a tool called Jupyter. Jupyter notebooks are a neat and interactive way to integrate text and code together, popular in data science. Unfortunately, the ipynb (Interactive PYthon NoteBook) format is notoriously difficult to work with in version control systems such as git, another tool you will use in this course.
For that reason, we have you install Quarto, an open-source publishing system. Quarto has a file format called qmd (Quarto Markdown), which we use as an intermediate format for managing Jupyter notebooks.
- Check which directory you are in by running the
pwdcommand in the terminal. If the result is not/work/pi_softdes26_olin_edu/[yourdirectory]run the commandcd /work/pi_softdes26_olin_edu/[yourdirectory]to move to the directory. We always want to be working in this directory! - Go to the command palette of VS Code, you can click on the gear icon in the bottom right corner and then “command palette” or hit F1.
- Type “Python: Select Interpreter” and select it when it pops up.
- Then select “Select interpreter path” and enter
/work/pi_softdes26_olin_edu/class_venv/bin/python3.12. This allows you to use the virtual environment created for the course. - To get these changes in your terminal, close and reopen it by using the trash can on the top right of the terminal.
Setting Remotes
- Run
git remote -v. This should output the following:origin git@github.com:myGithubUsername/softdes-2026-01.git (fetch) origin git@github.com:myGithubUsername/softdes-2026-01.git (push) upstream git@github.com:olincollege/softdes-2026-01.git (fetch) upstream git@github.com:olincollege/softdes-2026-01.git (push) - If the output does not contain an upstream, run
git remote add upstream https://github.com/olincollege/softdes-2026-01.git.
What in the World Did I Just Do?
You do not need to read this section to go on with your coursework, but you might find yourself asking: “what’s the difference between forking and cloning?”
Forking is creating a personal copy of the main repo on the GitHub servers. Forks are especially useful for collaboration with many users. Each developer can make a fork of the main repo and work on changes separately. These “downstream” changes can then be merged back “upstream” into the main project repo.
Cloning is copying the contents of a repo on a server to your computer. When you make changes to your locally cloned repo, they will not be present on the server until you commit and push your changes. If changes are pushed to the server, they will not be present on your clone until you pull.
When you set the remote in your cloned repo, you are setting an additional source for the project. You set an upstream in the clone of your fork so you can pull changes that are made to the main course repo. For example, a new assignment might get pushed to the main course repo. You can then pull changes from upstream to your version of the repo.
Helpful Notes
Unity has several ways of interacting. This is nice because you can pick what works best for you but can also be confusing. You can look at files through a file browser, or run jupyter notebooks from a separate notebook app. Use the same Slurm arguments you used for the VS Code app for the Jupyter/MATLAB app.
You can also look at Jupyter notebook files through VS Code.
- Set the interpreter to the class venv: in the command palette, type “Interpreter” and select “Python: Select Interpreter”, then “Enter interpreter path….” (folder icon), then “Find…”, and type or paste
/work/pi_softdes26_olin_edu/class_venv/bin/python -
In the upper right hand corner of the ipynb screen, use the “select kernel” button, then Python Environments, then class_venv

- You should now be able to run cells without a separate kernel set up
You can download a file from VS Code directly by right clicking on it.
Getting Help
There’s lots of ways to get help this semester!
- Check out the Unity Documentation: https://docs.unity.rc.umass.edu/documentation/
- Ask a friend in the class for help. (Or make a friend by asking for help!)
- Ask a CA or Instructor or the class discord for help.
- Ask for help on the Unity Slack channel, following these instructions: Asking Questions on Unity Slack