The parts that make up the Electrical and Firmware Subsystems
Making sure that the VRCar doesn't bump into any walls or objects.
We wanted to be sure that while the driver has full control over the car, the driver won't be able to ram it into a wall and break all the parts. To avoid this, we added distance sensors and code to move the car away from obstacles automatically if the car is within 5 cm. The main concern was the front and back distances as they would impact the car the most. The left and right sides are less likely to get stuck in the first place and would be easier for the driver to move, but are equally dangerous to get stuck in. We decided to use ultrasonic sensors as our distance sensor because IR sensors do not give accurate enough readings under changing light conditions or small distances.
The serial communication we opted for made the car very tethered, which goes against our design goal of being able to drive the car around. We decided to add in batteries and a telemetry unit so that the car can be wire free. We added batteries to power the Arduino and the motor shield. We were worried the battery for the motor shield might overload the shield so we added a variable resistor to the circuit.
For the code, please refer to this GitHub Link.
For the firmware, we were able to code the Pro Xbox ONE controller by using the inputs library. We defined a set list of inputs we wanted to use from the Xbox controller, and prepared them as inputs to be translated into motor speed data. The list of possible inputs were then used to be translated into data to be turned into motor speeds.
Xbox Controller Inputs:
SOURCE: Diagram of Xbox ONE Controller to Refer to for Inputs
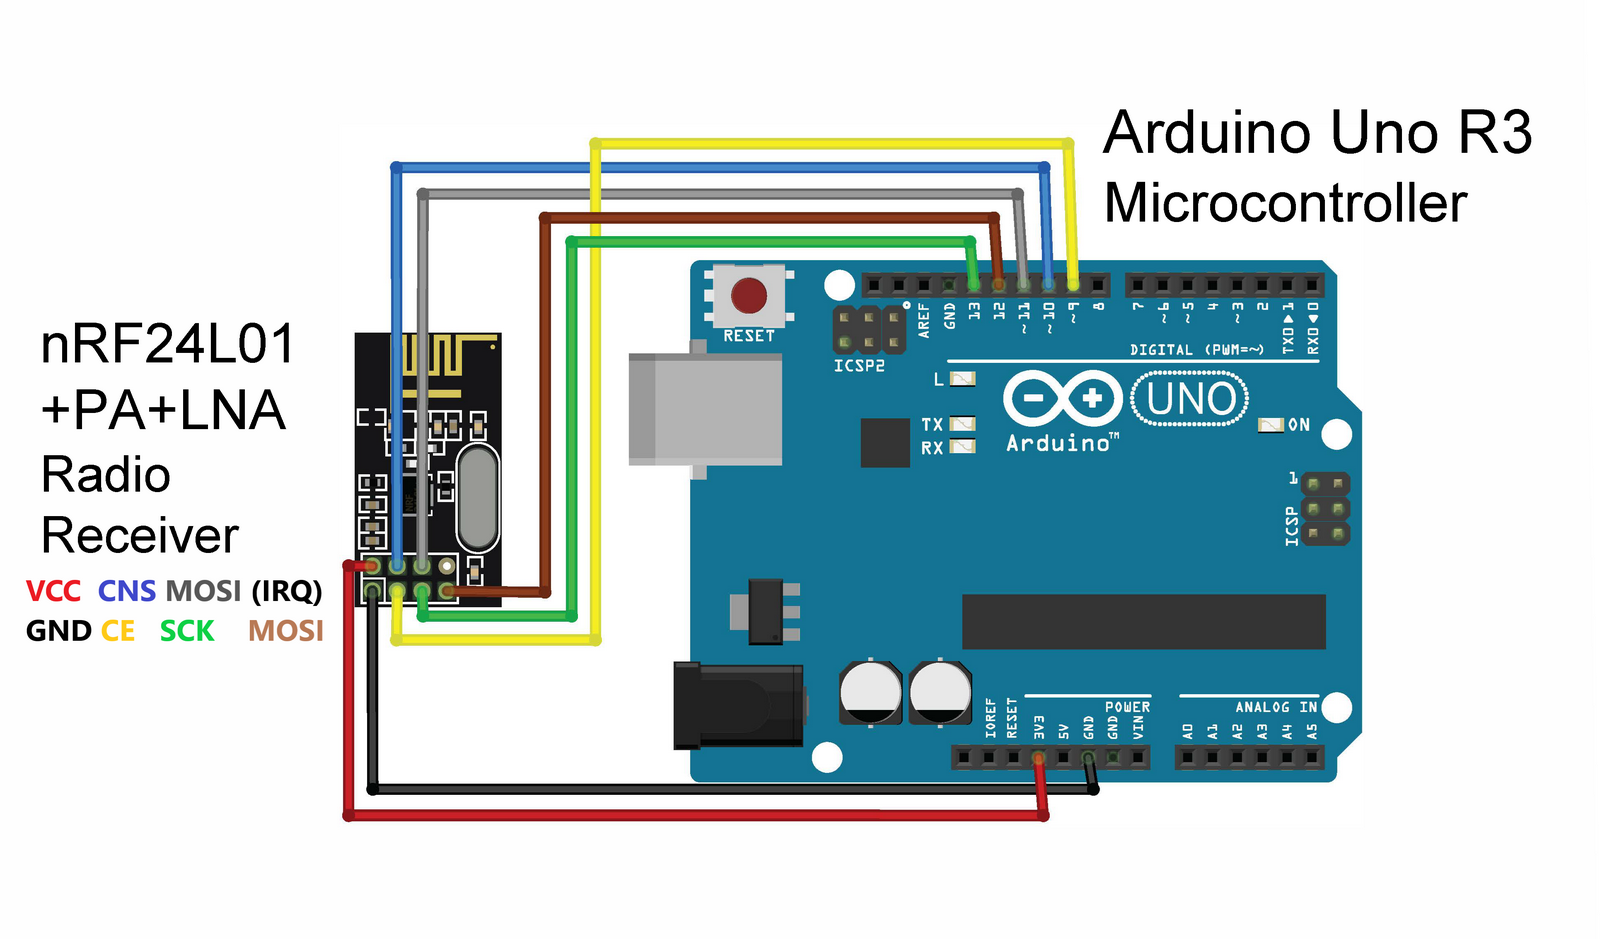
To eliminate the restrictions of cables from our VR car, we also approached wireless communications from the Arduino Uno that was embedded on the VR Car to the computer. To set up our telemetry parts, we initially used the 915 MHz radio modules that are widely believed to be powerful and stable. However, as the 915 MHz radio modules usually work for Ardupilots such as Pixhawk, we found out that it was not quite compatible with our chosen microcontroller Arduino Uno R3. Therefore, we switched to a pair of two nRF24L01+PA+LNA radio modules that are more adaptable with our microcontroller.
Given that this was an extended goal, we did not complete this part. This portion was not integral to our systems, although it would've been super nice to have. If you would like to see what was attempted through code, follow this GitHub Link.

Diagram of Arduino Wiring to Telemetry Radio Reciever
created with
Website Builder Software .