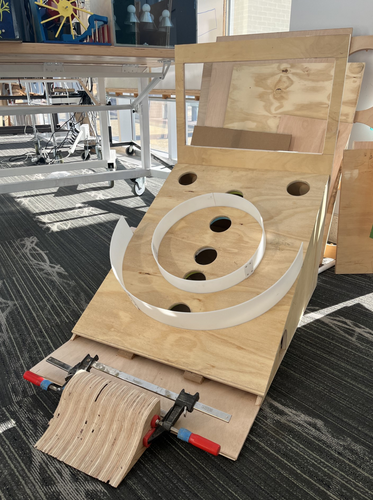
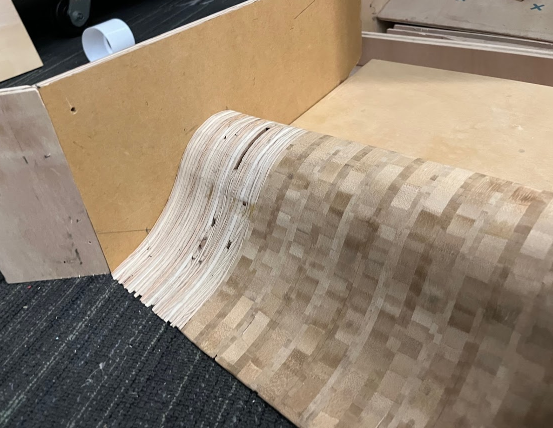
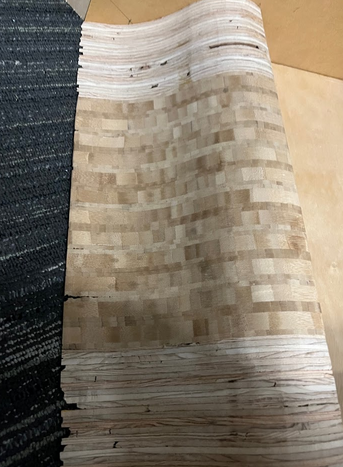
Our skee ball game had a large mechanical design component to it, including a heavy amount of fabrication work, largely using plywood.
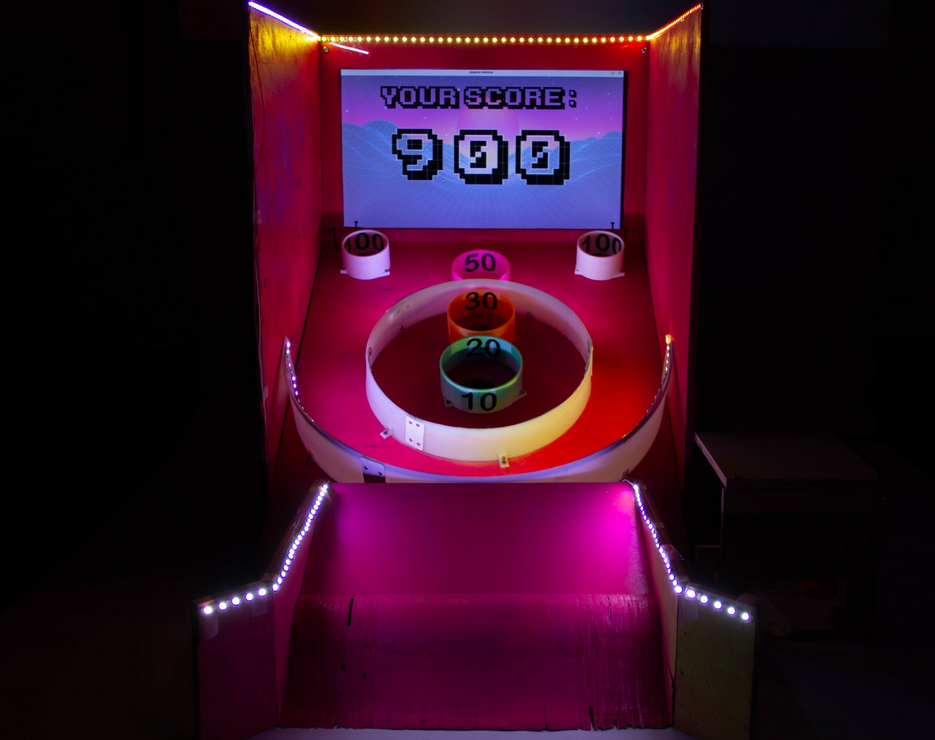
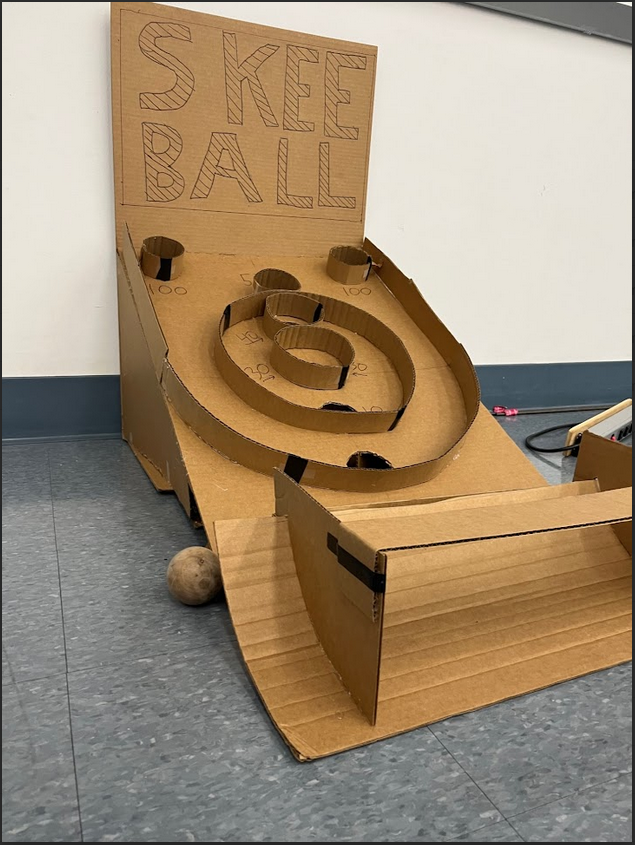
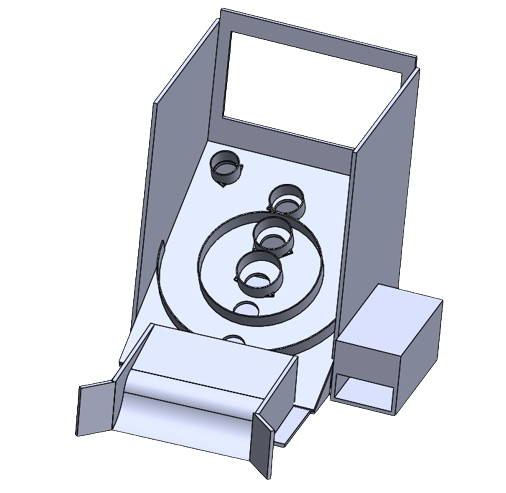
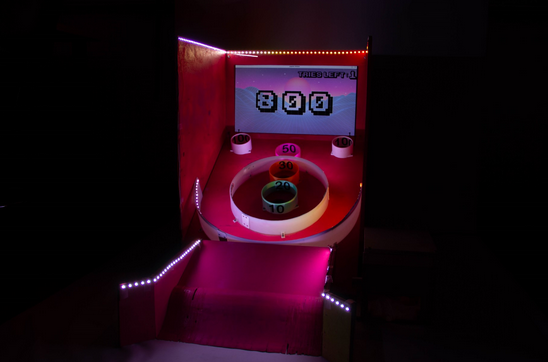
We based our design on the dimensions that we found from researching a variety of skee ball machines used both in arcades and created by DIYers for personal use. The majority of skee ball machines are designed with a table and a ramp attached to a score board and display. Due to size limitations for our pie project, we decided to design our skee ball so that it can be played anywhere on flat ground. This meant that while we could take some inspiration from other skee ball games for some aspects of the design, other design choices were made taking into considerations our specific goals of the game, supplies at hand, and our fabrication capabilities using the Olin shop.
We made a to scale cardboard sketch model of our initial design for the skeeball game board. We used large cardboard sheets for the side walls and base, and attached everything together using hot glue. We bent a cardboard piece to act as a ramp, and mounted it on supports. This allowed us to have a functional cardboard model of our skee ball game with which we could see if our idea for a ground skee ball game was a feasible one. This sketch model helped us solidify many of our design features, and highlighted potential problems, such as making sure balls don’t get stuck on the inside ball return.
The basic design of our skee ball game comprises a ramp, slanted scoring board with cups to catch the ball, an internal ball return, an external ball return, and an integrated score display monitor. This is an image of our final CAD for our game.
The base of the skee ball machine provides the structure for the game board, It is fabricated almost entirely out of plywood. We chose the design for the inside ball return out of necessity and simplicity. One specifically sized plywood sheet with four unique side angles is oriented in the base at such an angle that the ball will roll towards the exit hole no matter what scoring hole it falls through. We added a channel for the ball to find at the bottom, to ensure that it makes it out of the box even if the ball is scored through the lowest hole. The base also consists of two layers of side walls, one which supports the scoring board, and the other which act as borders to the game, preventing the ball from being thrown off the board. The top score board simply rests on top of the base supports, allowing it to be easily removed to access the electrical connections and sensors underneath.
We added a ball return to quickly return the ball to the player without them having to walk back and forth to collect their balls. The ball return uses two 12V DC motors attached to small compliant wheels which provide strong traction to the smooth wooden ball. The motors are attached vertically to a wooden mount, with a channel running between them to direct the ball to roll in between them.
The scoreboard for a skee ball is its most iconic feature. 7 holes and a range of cup sizes proportional to the point value of each hole. Because this board is such an important piece for our skee ball game, we chose to use the shop bot to ensure its geometric perfection. The smaller cups which surround each of the holes are 3d printed, and are attached to the board using small wood screws. The larger ball catching rings are made from Delrin scrap we found in the shop. They slot into small channels which the shop bot cut in the board, and the individual sections are riveted together to provide structural integrity.
To support and integrate the TV monitor with our skee ball game, we designed the backboard of the game base to hold the monitor securely. We built a shelf for the tv to stand on, a cut out rectangle which matched the screen, and used a piece of clear acrylic to protect the TV.
For the ramp we took inspiration from many existing skee ball machine designs, in order to find the optimal curves which would facilitate intuitive game play. After we decided on a shape for the ramp itself, we created a template for the profile we wanted. We then used the profile to cut 14 individual ramp pieces on the bandsaw, which we then glued together and sanded to have a consistent finish.
We then measured and cut side pieces which allow the ramp to rest on the main body of the game. Finally, we added a shallow angle ramp above the main jump, to help any balls which didn't make it onto the score board, to roll back down the ramp towards the player. The entire ramp piece is modular and not permanently attached to the main game board, allowing it to be carried separately for transportation.
The wooden balls for the game were turned by hand on the wood lathe out of Ipe wood. The ball shape is first roughed out using spindle turning, then a jam chuck is used to refine the shape to a perfect sphere. After lots of sanding and finishing, the ball is a perfect sphere and strong enough to resist all impacts during play.
The sensors were mounted with the model to the right. The ring is slightly larger than the hole the balls fall through to prevent contact. The sensor sits in the extruded houses where the leads are physically separated. The devices provide a consistent backboard for our sensor readings which prevents the sensors from potentially missing a ball coming through.
We had multiple design goals for the mechanical component of our game which helped inform the decisions we made while CADing and fabricating it. Because it is a pie project, it had to be a reasonable size. This led us to adapting the shape of a traditional skee ball game, which has a long ramp attached to the scoreboard, into a game which can be played on any flat ground.
We wanted to make the game out of mostly found/scrap materials so that it would have as small an environmental footprint as possible, meaning some of the materials we found (such as the white Delrin used in the scoreboard) dictated some aspects of our design. A final design constraint was that we wanted our game to look and feel like an arcade skee ball game, which impacted the size.
On the mechanical end of things, we didn’t have any one specific challenge that stood out over the rest, but we had many challenges that we had to learn to address or work around. One major challenge was trying to figure out how to complete assembly while still allowing electrical engineers to make changes and test, especially since the sensors would stop functioning frequently. We implemented a rest for the final hole board to sit on which would stay stable but also allow the hole board to be removed. In addition, before final integration, we allowed the backboard of the structure to slide up and down for easier access. In addition, finding the proper material and construction method of the Skee-ball cups was harder than expected. We initially found a flexible white plastic to rivet into cups, but we didn’t have enough for all the cups. When we looked in stores to find a similar material, we were unsuccessful. We then decided that 3D printing could be an avenue we could explore, and after testing, we realized the cups at a regular infill were sturdy enough for gameplay.
Another issue that often came up was minor dimensioning of the structure itself. Sometimes pieces would be too long or we would struggle to figure out what dimensions we would want to cut the wood. This was a pretty major issue with the internal ball return we constructed in the Skee-ball structure. In the end, we went iterated a lot through sizing and cutting pieces down as needed. We intentionally connected pieces to be as flexible as possible, so nothing major had to be taken apart to perfect the main structure.
created with
HTML Website Builder .