Sprint 3
Sprint 3 Mechanical Design
Here is the sprint 3 prototype in action. This showcases the new string and foam design with the 3D printed spine. It does not show the base shape change yet.
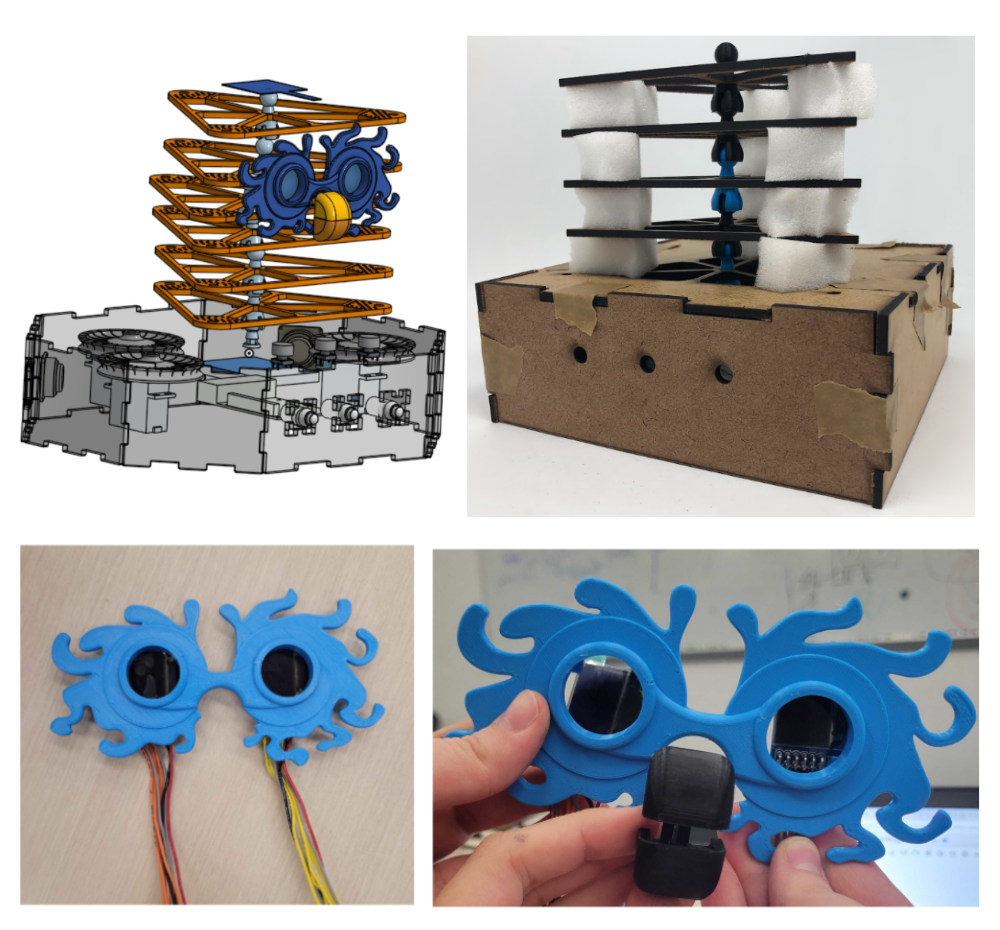
After we solidified how we wanted to pivot our design, we got to work refining all of the details and creating more CAD for individual pieces. We changed the base's design to be more interesting in the form of an octagon, but that posed its own unique challenge with the fact that the box joints don't line up perfectly. Because we were thinking of how to assemble everything, we created mounts for all of the components and put emphasis on finalizing their placement in the base. The faceplate was also created to house the LED screen eyes and add to the space aesthetic of the creature.

Here is the CAD for some of the individual components. The speakers, LED screen, RGB light, button, spool, and beak movers are featured in this image.
An important aspect that we adjusted in this sprint is that we changed the springs to foam. We found the springs to be too stiff and they did not allow for the slats to bend enough. After a lot of deliberation, we decided that upholstery foam would be perfect. We updated the slat CAD to include many little holes to allow the foam to be sewn on. We also got to work creating large spools that allow the strings that pulls the creature to spool around once. There are three spools with one on top of each servo.
Sprint 3 Electrical Design
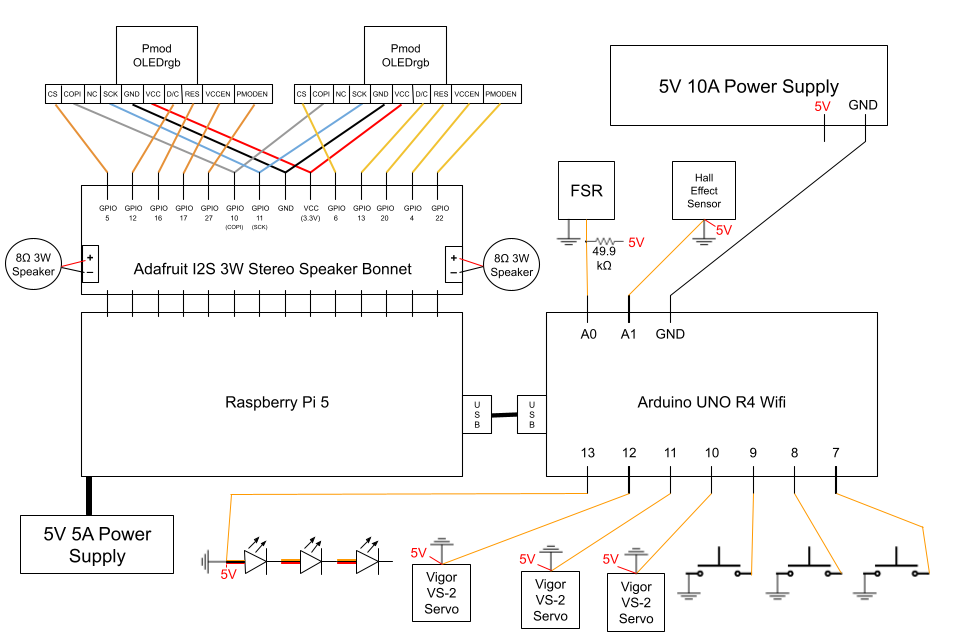
It was during this sprint that the final circuit design was finalized, including Pin numbers that could be shared with software. A final power supply was ordered. The full circuit was wired and soldered together the same day the power supply arrived. It includes the Pi with a speaker bonnet and two speakers, two OLED screens, three servos, the two sensors, the pixel LEDs, and three buttons.
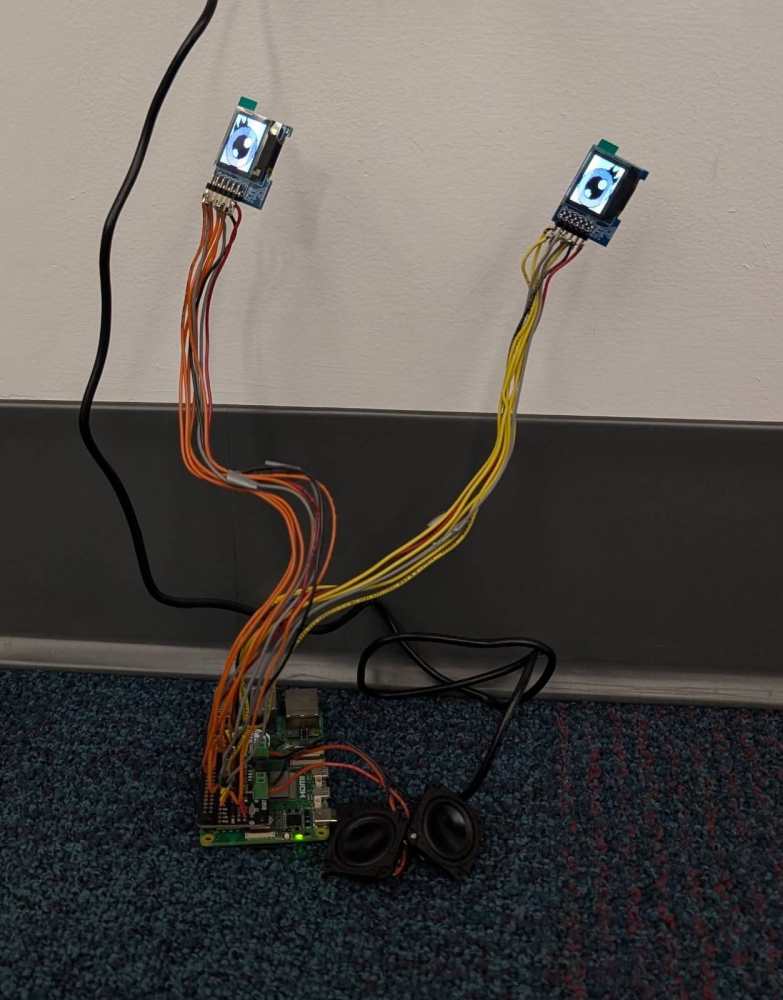
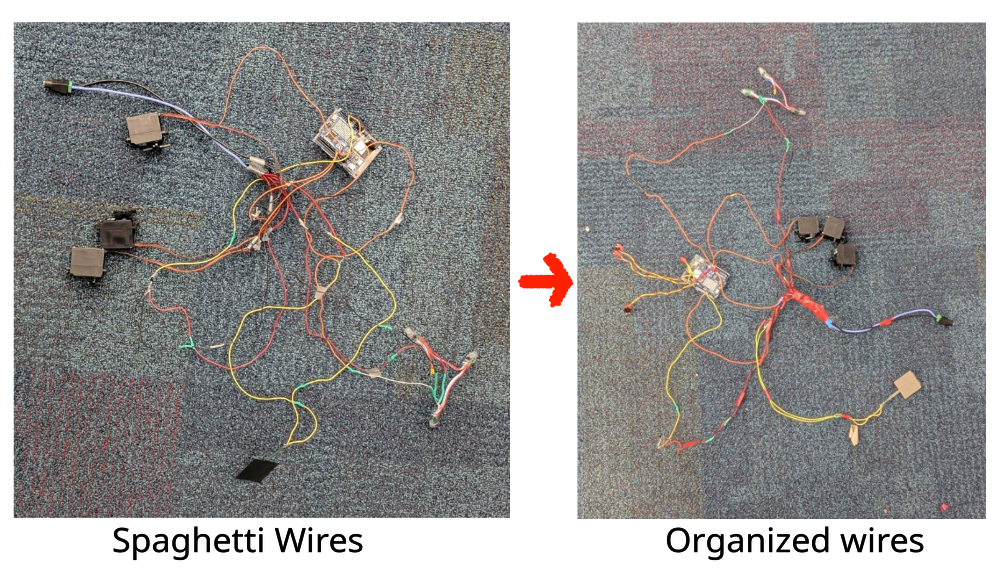
When the circuit was first wired, our focus was on quick completion so testing of components and inital code testing could be completed. Additionally, there were no heat guns available for use during the soldering process that day, so electrical tape was used as a temporary substitute. Once the testing process was underway, and on a day that the other software subteam member was busy, wire management became the focus. We added heatshrink tubing and resoldering to more appropriate lengths based on the known mechanical requirements. We also made sure to properly detangle everything and twist or tape things together to minimize future issues.
Another major step for electrical this sprint was getting the screens up and running. We had to do research on SPI control, specifically with the screens we had that required 10 pins to be wired. It took significant effort and testing to ensure that everything was properly secured because we had a set of pins that were fairly easy to bend and we didn't have the appropriate connector. The appropriate connector wouldn't have been of much use to use because we were soldering the screens to the speaker bonnet breakout holes. We tested continuity before applying power which was good because we had to remove a small amount of solder connecting two pins. It took a full day and the joint effort of software and electrical (or rather one person on both subteams) to get the screens fully operational due to a lack of existing drivers that would have worked for our project.
Sprint 3 Software Design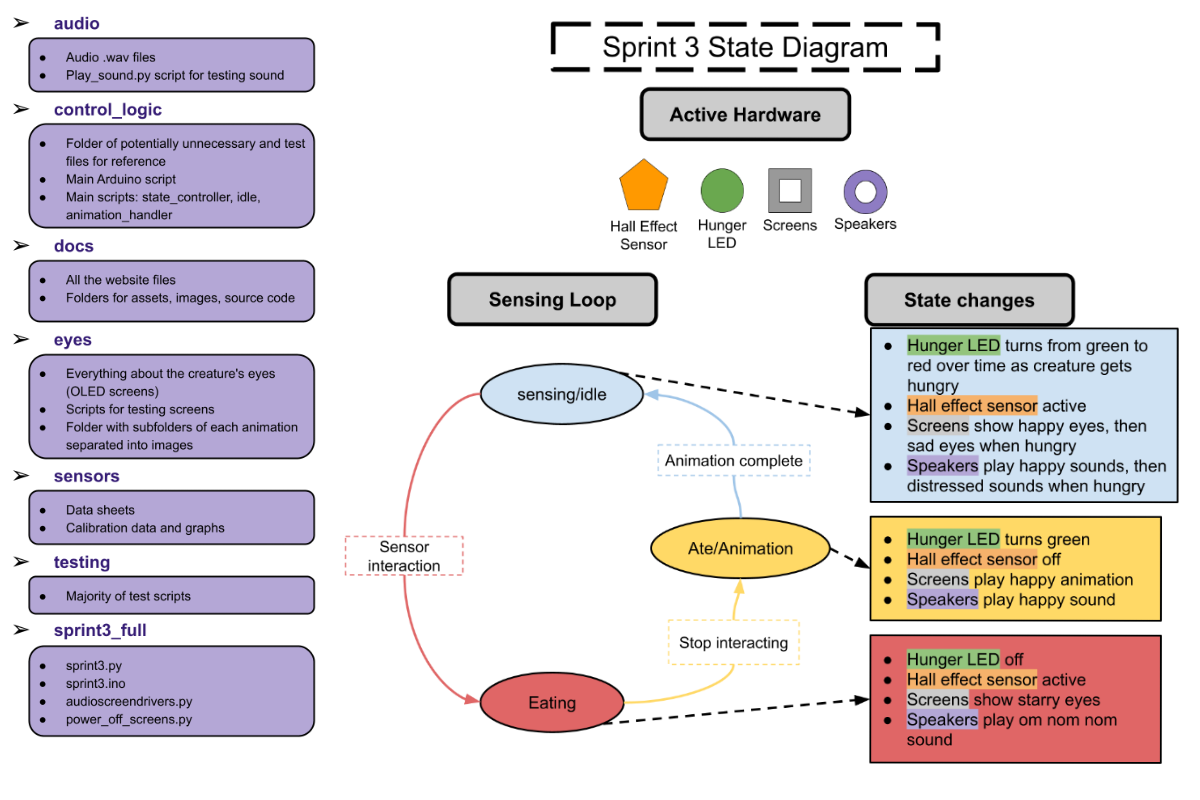
With the speakers and screens wired, we were ready to integrate them into the software. The first step was writing custom drivers for both the speakers and the screens, allowing us to run audio files and animations quickly and easily using simple function calls. This approach helped keep our final state machine(s) much cleaner.
Since this sprint marked our first time integrating the state machine with all of the electrical components, we opted to use the simplified state machine pictured above. In this version, we only implemented part of one possible loop of the system. This loop used all of our components except for the buttons, which were implemented later, and the servos, which would have added a significant level of complexity to testing and were therefore excluded from this initial integration.
Integrating this smaller portion of the state machine allowed us to debug individual aspects of the system much more quickly than if we had worked with the full implementation. It also provided the foundation needed to revise the complete state machine and made the next round of integration considerably smoother.