Process
This project was divided into 3 sprints, each lasting for 2 weeks. We presented our chess board during PIE Demo Day and the Olin Expo.
Sprint 1
.jpg)
Sprint Goals
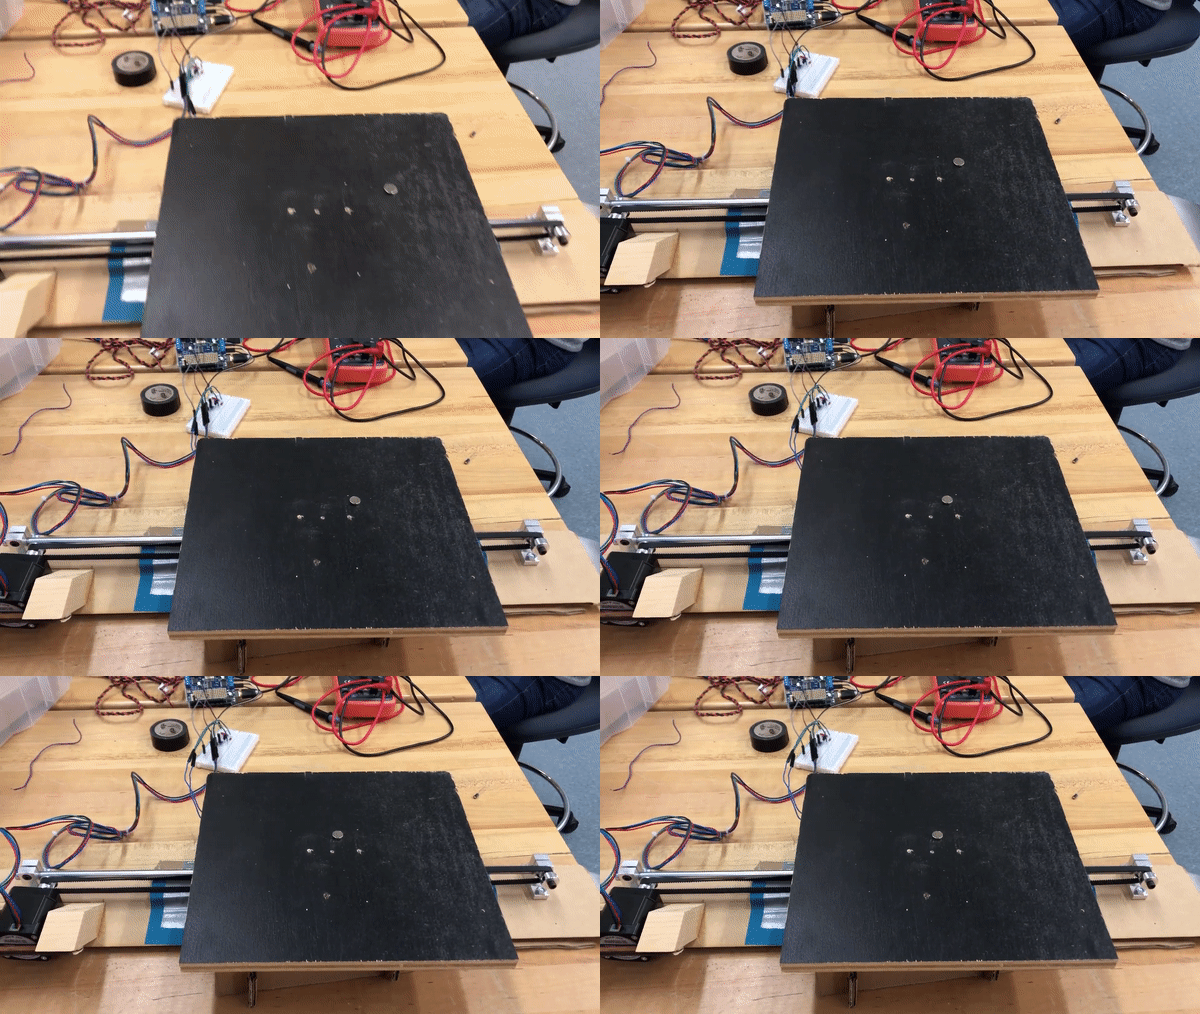
Our goals were to have a 1D gantry with an electromagnet attached to it and be able to test if it could successfully move a magnet through a sheet of wood.
At the end of our first sprint, we had:
- A test chess piece with a magnet attached
- Electromagnet mounted to a 1D gantry
- A not-to-scale hardboard and cardboard box with 2 open sides to test the electromagnet
- Basic board control software that used an Arduino to move the electromagnet to pick up a piece, move it, and release it
- Basic chess logic in software
The human move tracking was still in the concept stage, and we recieved valuable feedback and suggestions to use Hall Effect sensors, RFID tags, cameras, etc. We decided to test the basic functionality of a camera in our next step and use sensors as a backup.
Takeaways
Our biggest takeaways from this sprint were about pivoting our idea, getting parts, and scheduling. We originally wanted to do magic chess, but couldn't figure out a compelling method of input to move pieces that would work beter than simply moving the pieces ourselves. Eventually, we settled on single-player chess so we would have a need to move the pieces in a cool way without touching it. We also learned that scheduling meetings is difficult and we decided to send a reminder text about meetings. For future Sprints, we learned that we should order parts early so we aren't scrambling the night before because our parts arrived late.
Sprint 2

Sprint Goals
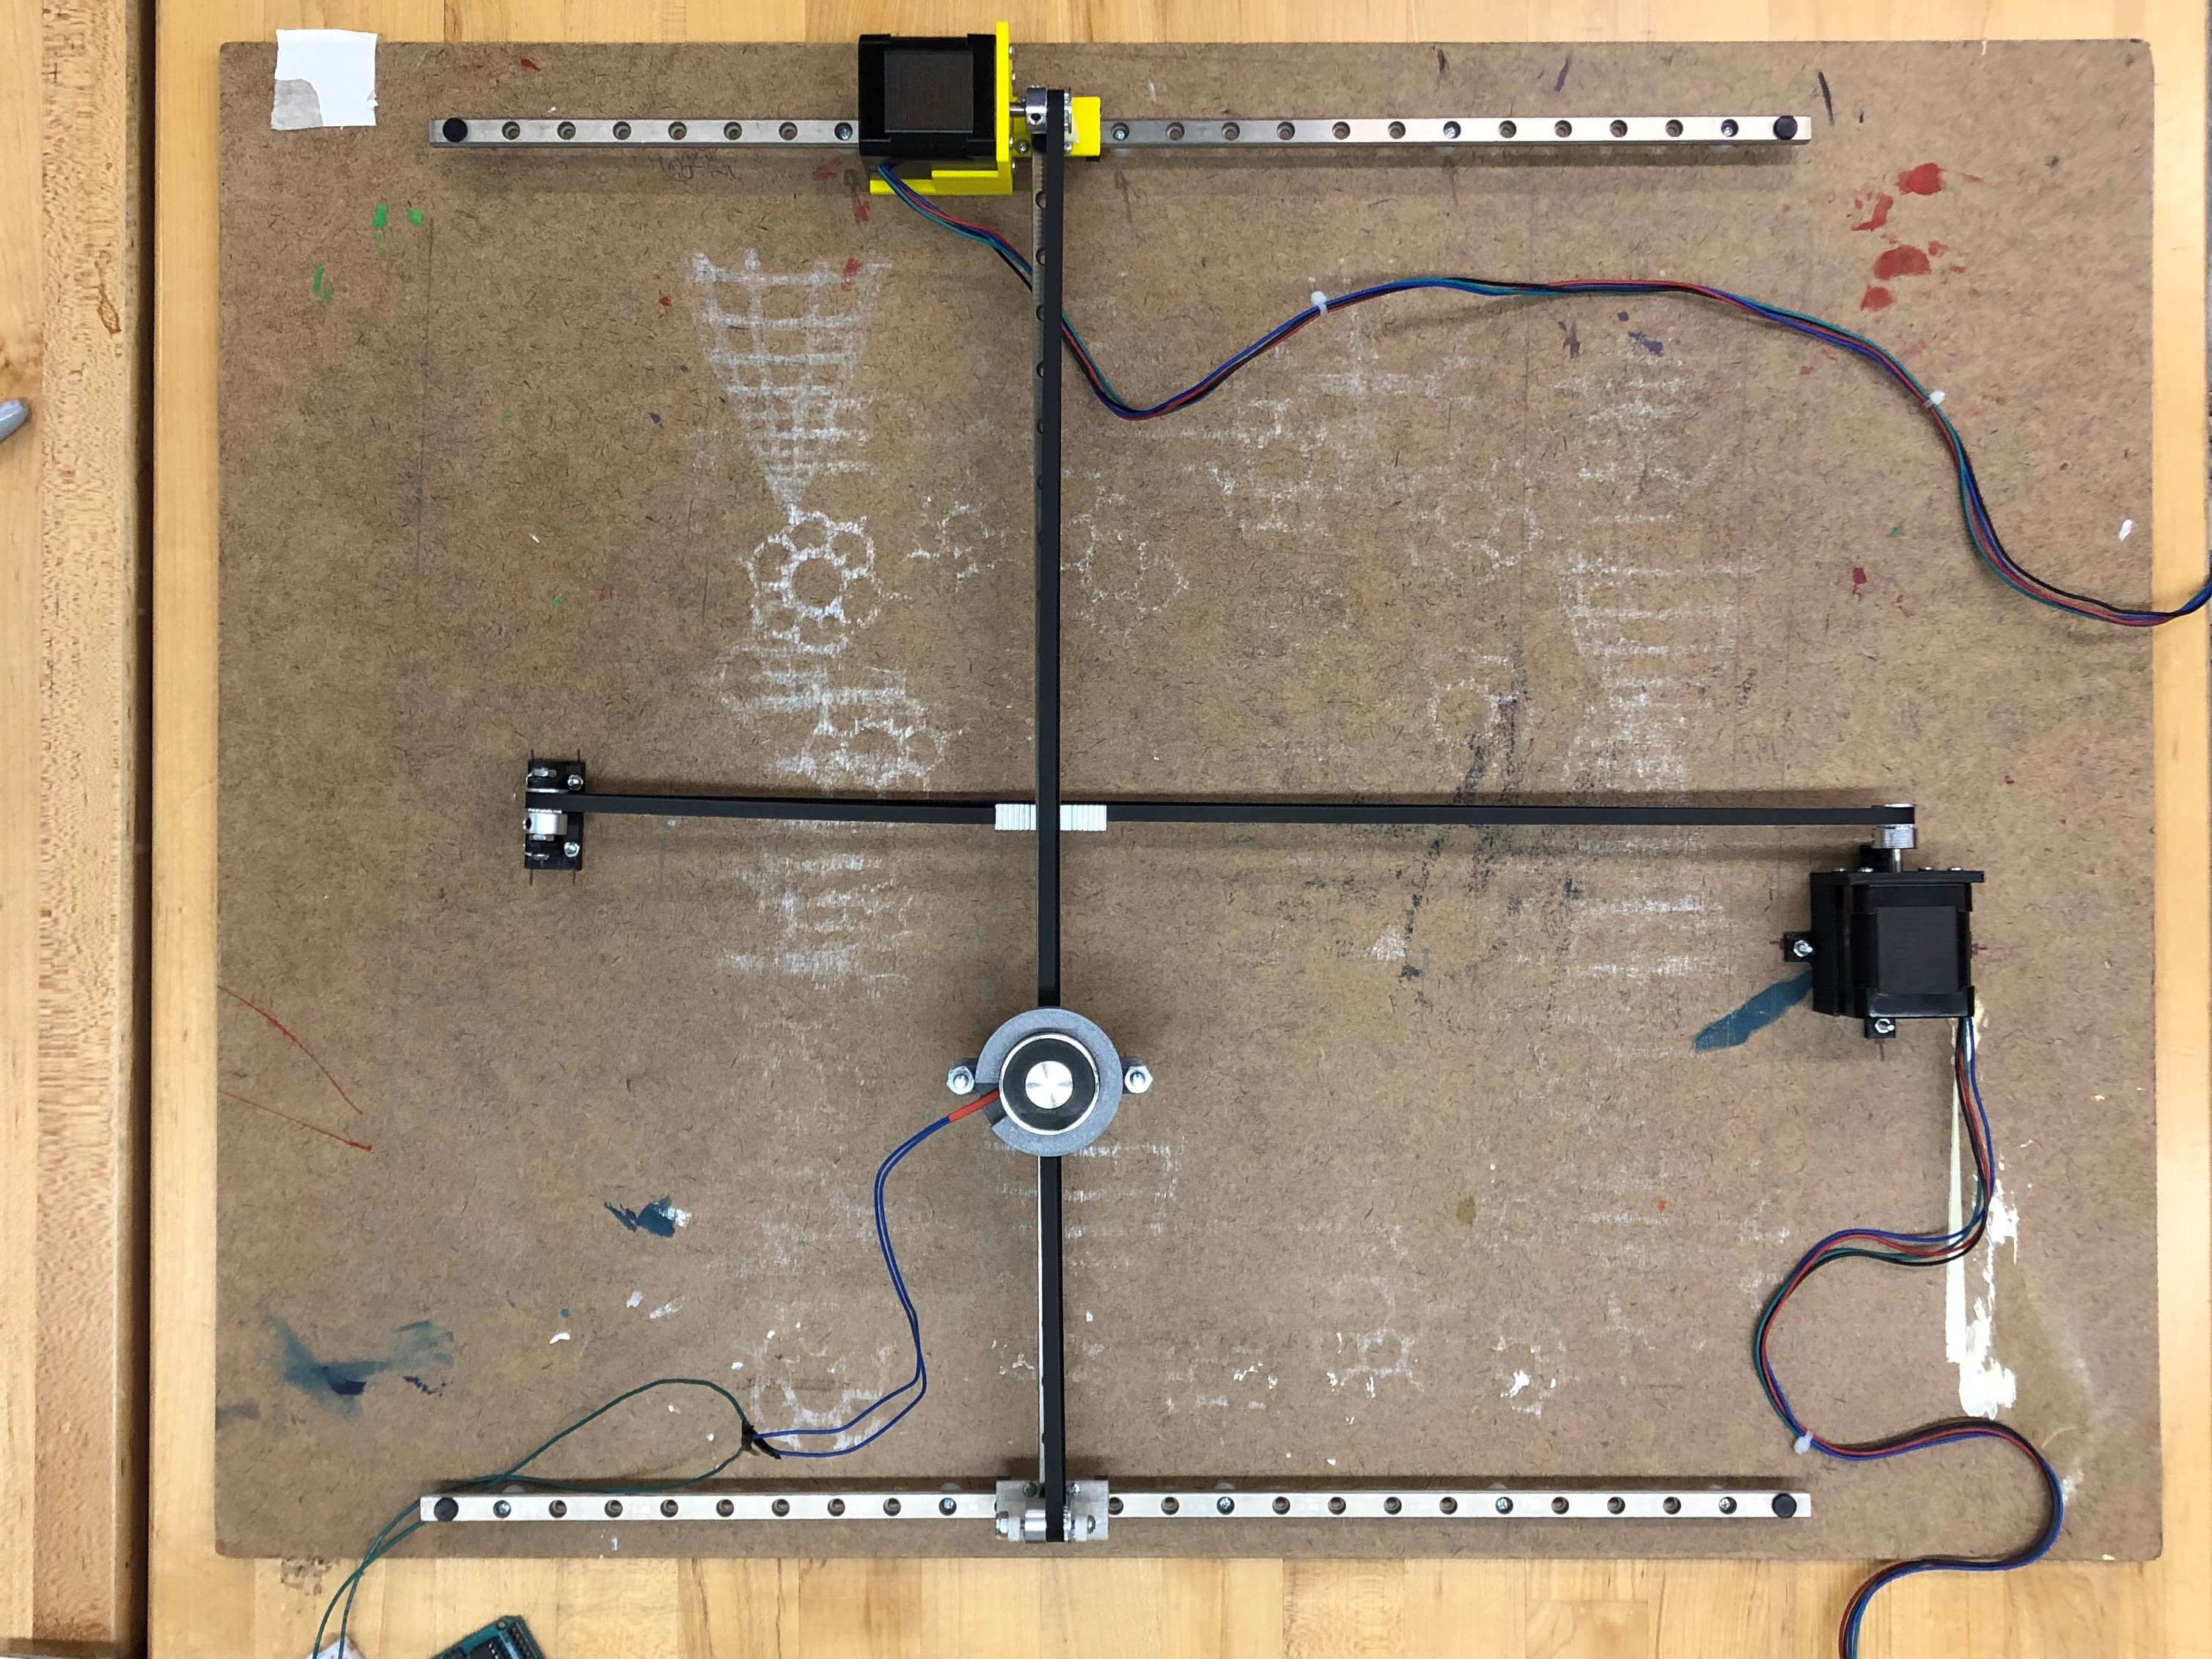
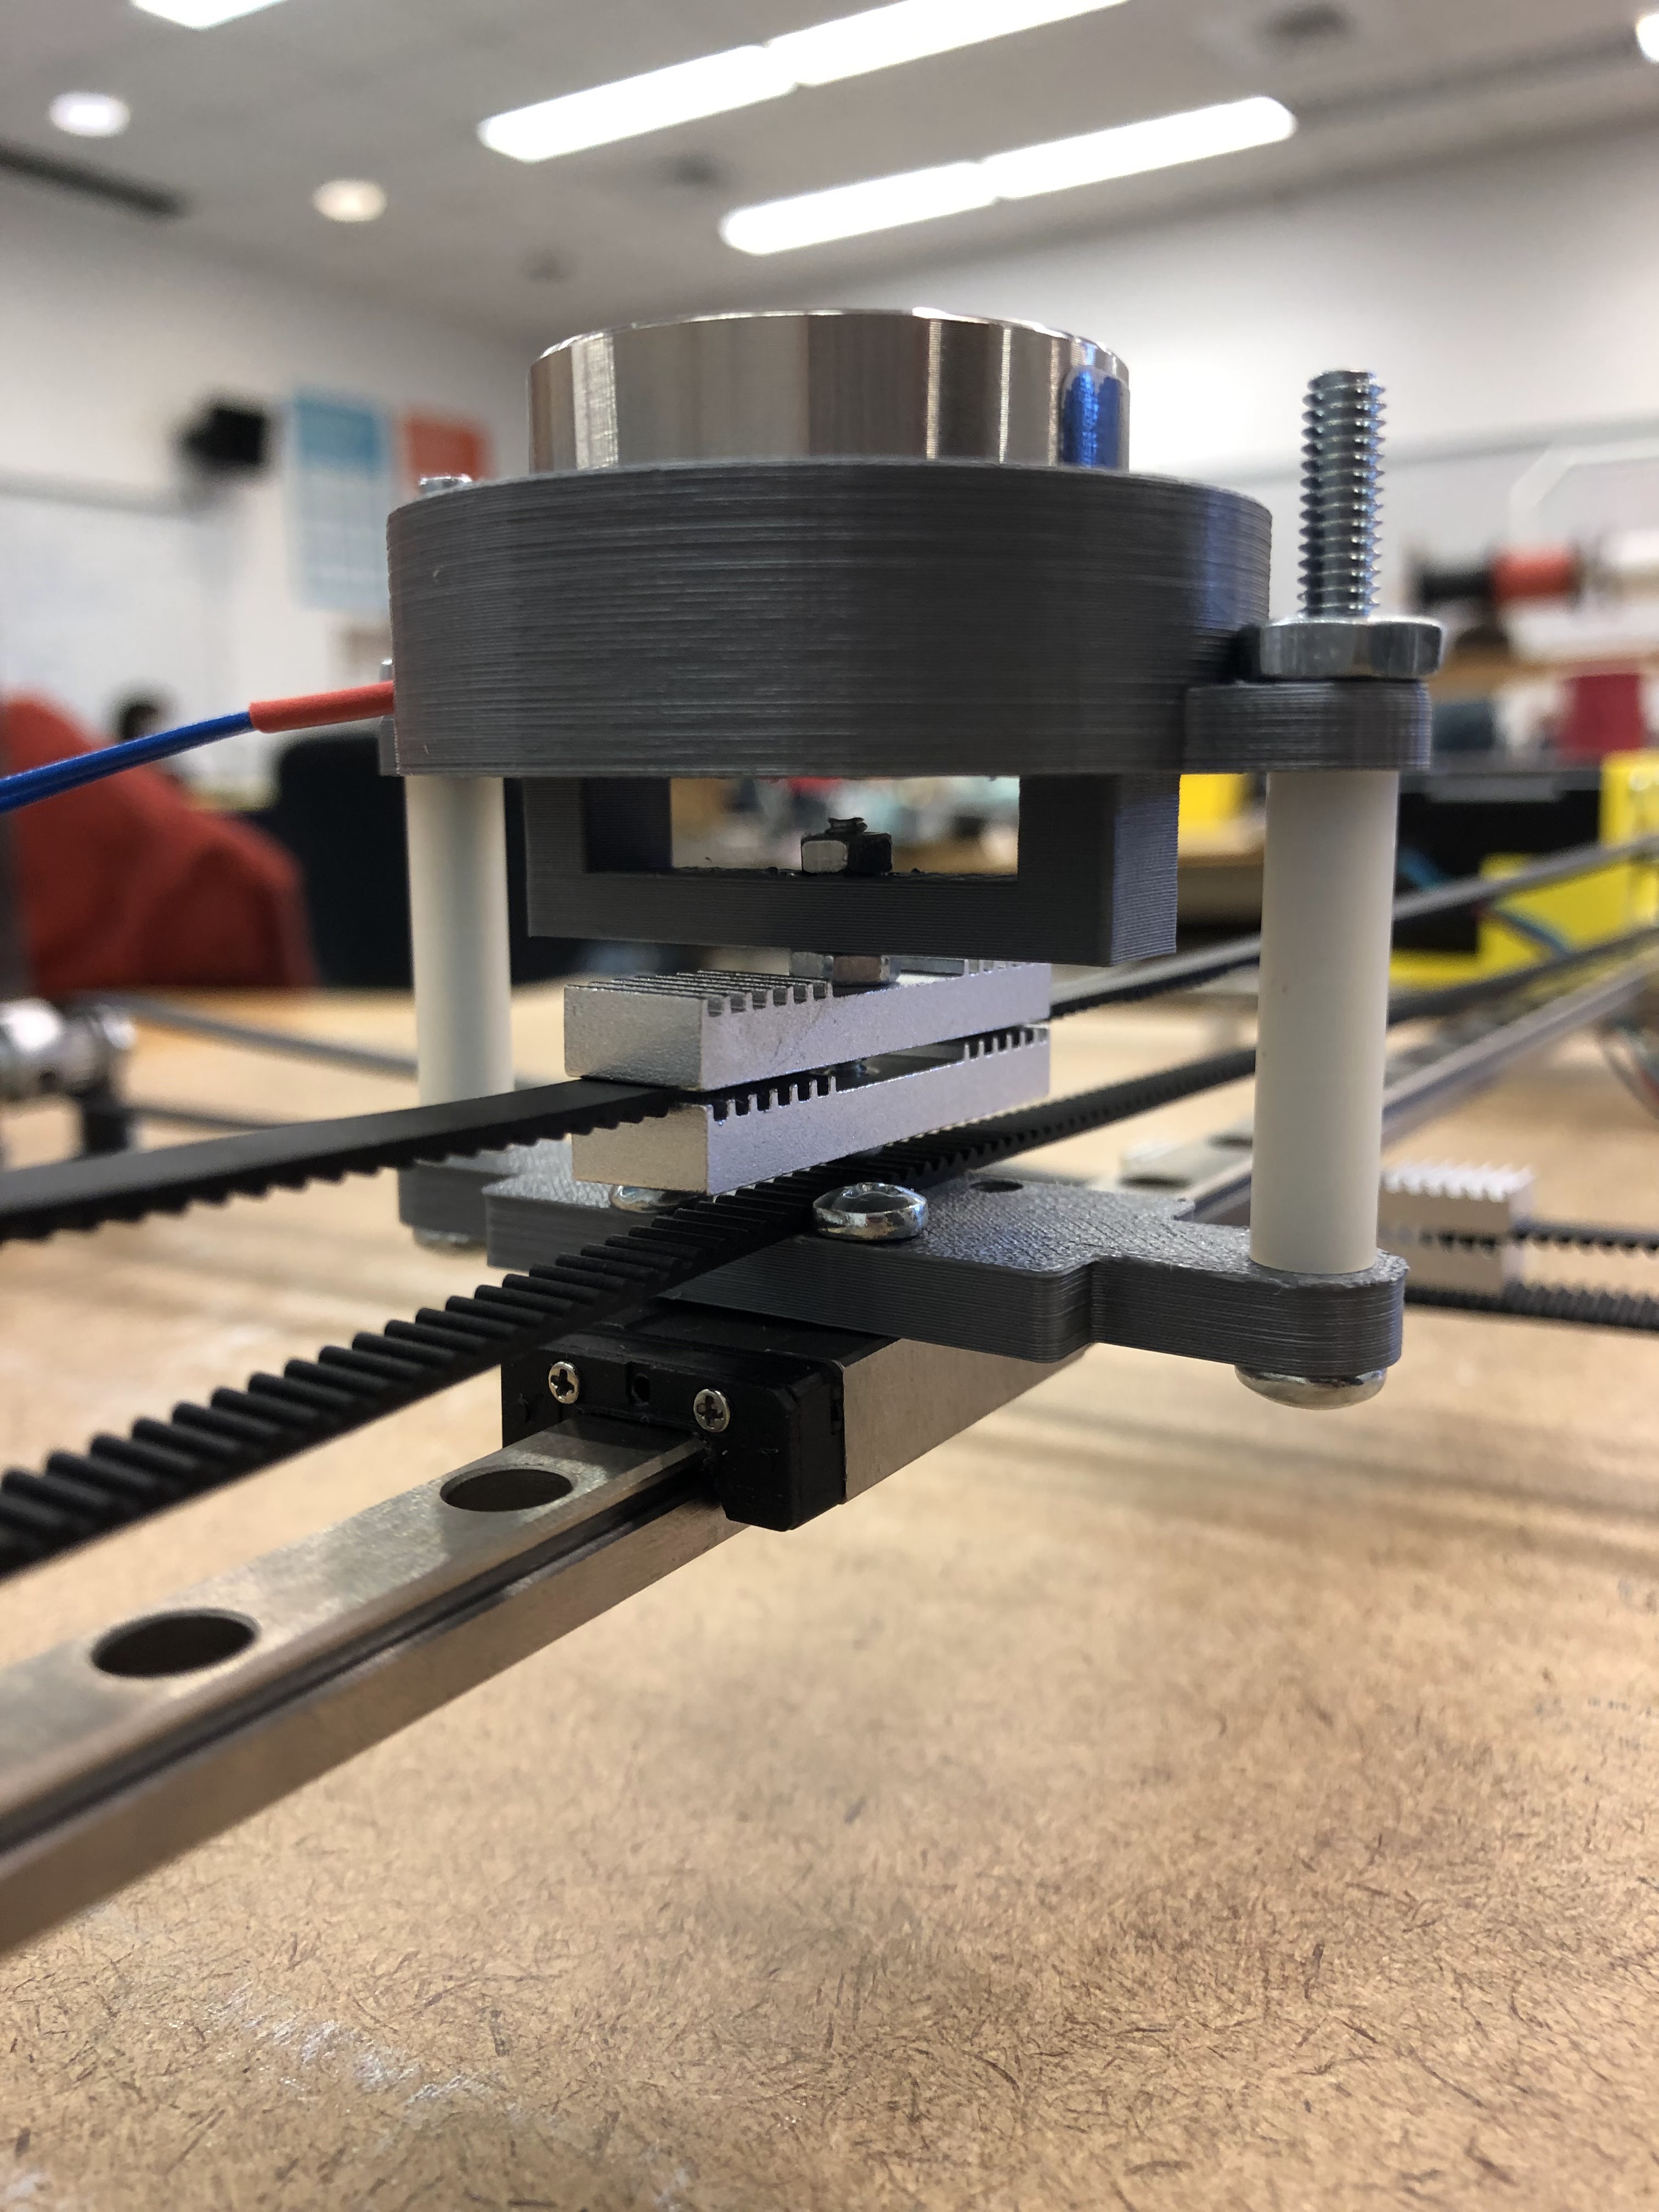
Our second Sprint was structured differently in that it was more of a check-in on progress than a deliverable. Our goals for this check-in were to have a fully functional 2D gantry, wire up LED lights and incorporate drivers for the stepper motors, and have a basic chessboard to go over the gantry. We also wanted to test whether using a camera would work to detect the state of the chessboard.
At the end of our second sprint, we had:
- A lasercut chess board (minus the chess tiles) with LEDs attached
- A 2D gantry
- Software that could detect the location of AprilTags through a camera
We had the above working individually, but did not get to a stage where we integrated everything into a single system. The biggest contributer was some miscommunication across subsystems, specifically talking about the dimension of the chessboard so it would have room for captured pieces and incorporate gantry reach. We also pivoted the rods we used for the gantry in this Sprint. Once assembling the 2D gantry, we realized that the tolerances were too loose with the rods we bought for the accuracy we wanted with the gantry movement, so we made the decision to buy and use a more expensive set.
Takeaways
Our biggest takeaway was to spend time talking through details of the whole system to clarify what each subsystem has to do and make sure everyone is on the same page. That way, we can minimize having to redo parts and needing to make up for lost time. For the last Sprint, we needed to recut the chessboard with correct dimensions, test the camera software using real chess pieces and a full sized chessboard, and more deeply integrate everything.
Sprint 3
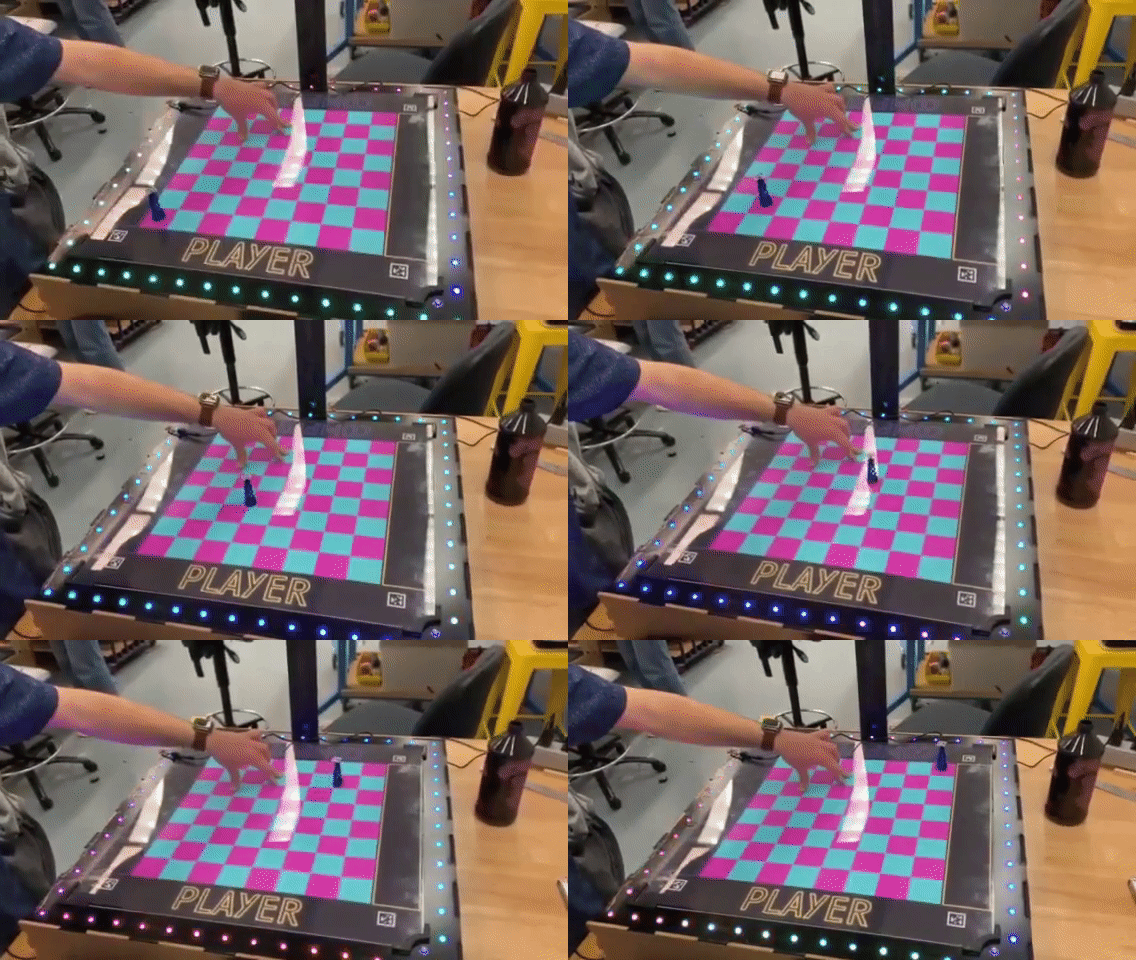
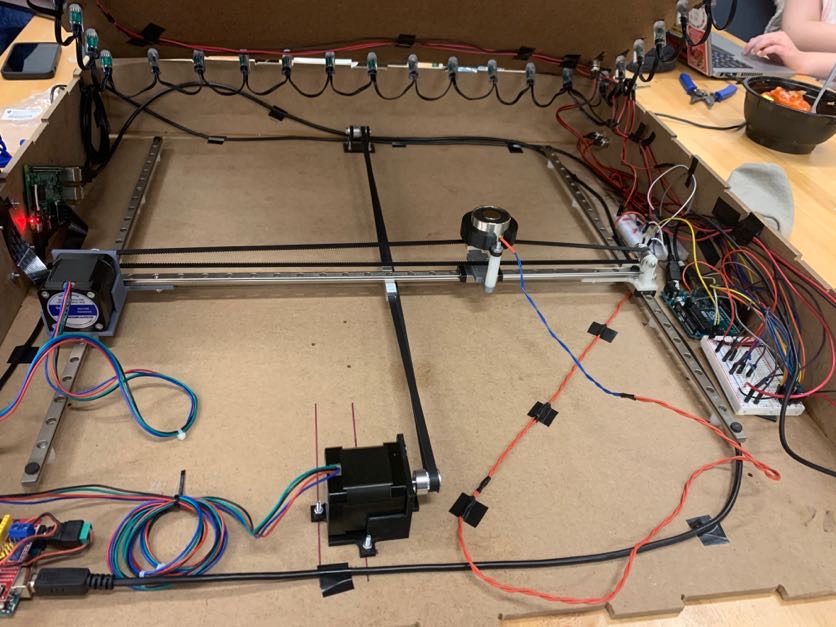
Sprint Goals
For our final Sprint, we wanted to get as close to what we wanted to present on Demo Day as we could. This meant integrating all of our subsystem parts into a single chessboard system and working on the software subsystem.
At the end of our third sprint, we had:
- A full sized, polished chessboard
- 2 full sets of chessboard pieces with magnets incorporated
- A 2nd iteration of pulley and motor mounts
- All electrical components incorporated
- Integration of buttons
- Software that detects the center of each chess tile and can move a chess piece to it
- A camera mount and camera integration
- Raspberry Pi controlling the entire system and communicating with Arduino over Serial
- Hardware controlled by Arduino
- Chess AI that obeys chess rules and avoides difficult moves (knights and captures)
- AprilTags attached to all chess pieces
We made a lot of progress between Sprints 2 and 3, but we still felt as if there was a bit of work to do before Demo Day, mainly in solving the problem in the communication between the Raspberry Pi and Arduino and expanding the chess logic to cover a full game.
Takeaways
A big takeaway during this Sprint was pivoting the material we were planning to use for the chessboard. We were originally going to lasercut all of the pieces using 1/8" stock and the large laser cutter at the Weissman Foundry. We pivoted to using 1/4" MDF to have sturdier material for the base and the walls of the chessboard, and decided to ShopBot those pieces. Getting our chessboard assembled ended up being delayed by a couple days due to ShopBot scheduling and cutting issues.
Check out Grandmaster in Action
