
Cyberflex
Cyberflex
Our electrical team was very intentional in finding sensor
placements for the muscles as well as utilizing DC motors and motor shields to work alongside with the mechanical team.
Our electrical system was kept fairly simple. For data collection we simply connect our EMG sensors to our arduino analog ports, along with connecting them to 5v of power and ground.
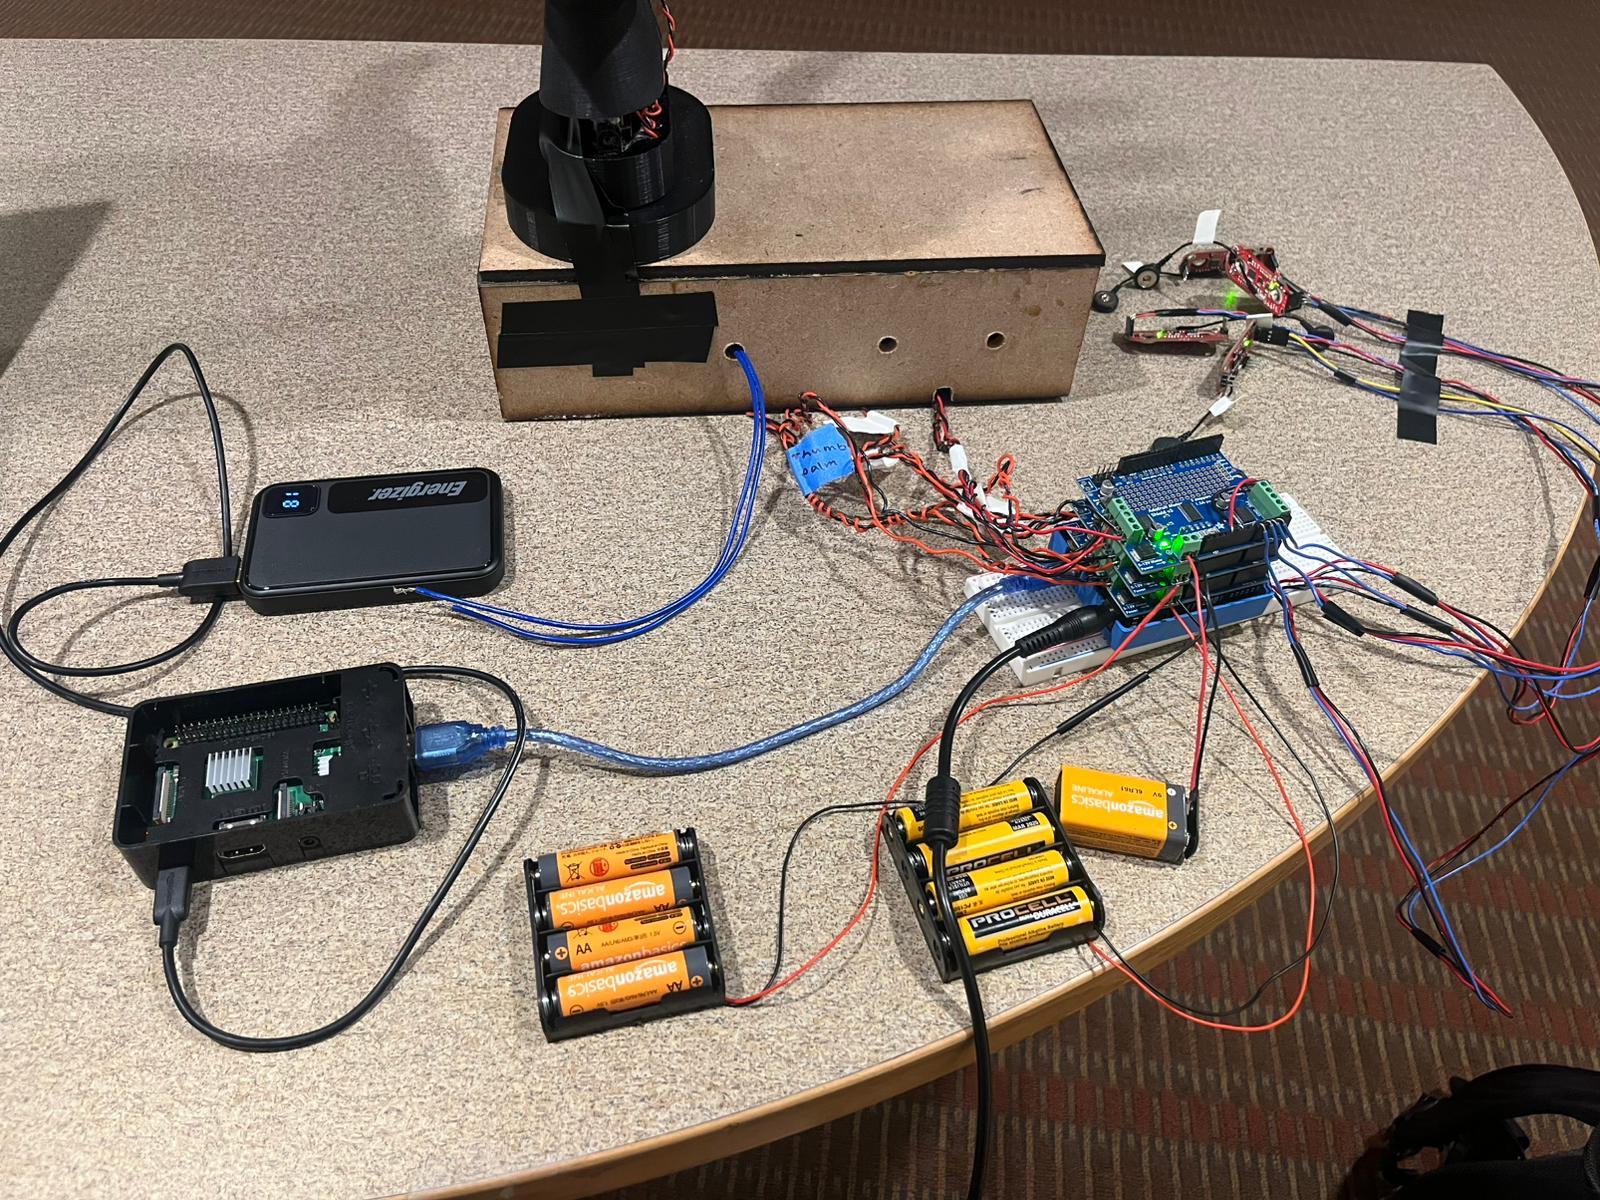
For gesture prediction and motor movement, our system gets more complicated. First we start with our arduino running DC_Real_Time.ino as its firmware. On top of it we have 3 motorshields to control 8 motors in total. The first motor shield is supplied by a 6v battery pack and it is connected to the index, middle, ring, and pinky finger motors. The second motor shield is also supplied with 6 volts of power and is connected to the two thumb motors. Lastly, the third motor shield is powered by a 9v battery of power and is connected to two motors in the wrist which control up and down movement.
We then again connect our EMG sensors to the analog pins and to common ground and 5 volts of power. Lastly, we power our Raspberry Pi with a battery pack supplying 5v, and connect it directly to our arduino using a usb cable. We also connected the arduino to 12v of power from a wall adapter to save the power bank's battery, but this isn’t strictly necessary if you want to keep the system wireless.
We also had an implemented wrist rotation, but due to some mechanical and electrical limitations, we were unable to get it fully working in time for our demo. We do however have a video of us powering it on and off to spin it which can be seen below:
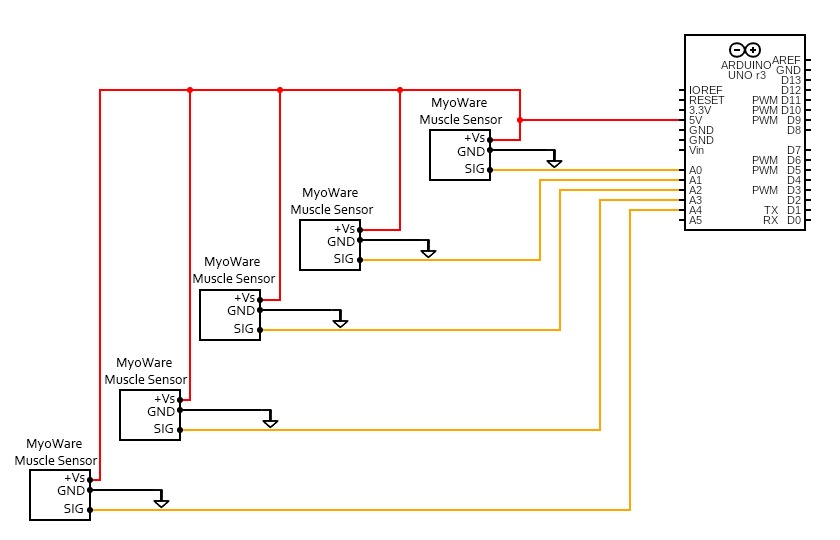
Above is the data collection circuit diagram.

Above is our electrical diagram for live predicitions.
We have a total of nine motors put together with an Arduino R4 and three motor shields. In total: five of the motors are 6V DC motors controlling each of the fingers (with 2 controlling the thumb), two of them are 9V DC motors controlling the up and down movement of the wrist, and the last one is a 120V Rotational Synchronous AC Motor controlling wrist rotation.
Moving on to how we actually collected our data, we used Myowear sensors to collect sEMG Data from our arms. We read a multitude of research papers and experimented on ourselves extensively to find optimal spots sensor placements. It was decided that we wanted to use extrinsic, superficial muscles as they are best for recognizing sEMG signals; we initially used five sensors as we found that to be an optimal number to get a high accuracy on our Machine Learning Models, however, due to an unforseen electrical issue, our 5th sensor did not end up working, therefore we had to unfortunately retrain our model using 4 sensors (removing the sensor on the Abductor Pollicis Longus muscle).
To place SEMG (surface electromyography) electrodes, locate the middle of the muscle belly of the target muscle, position the electrodes parallel to the muscle fibers, and place them between the motor point (innervation zone) and the tendon insertion, avoiding the edges of the muscle where crosstalk from neighboring muscles might occur; ensure proper skin preparation by shaving and cleaning the area before applying the electrodes to optimize signal quality.
The following are all of the muscles that we utilized for collecting data and live reactions:
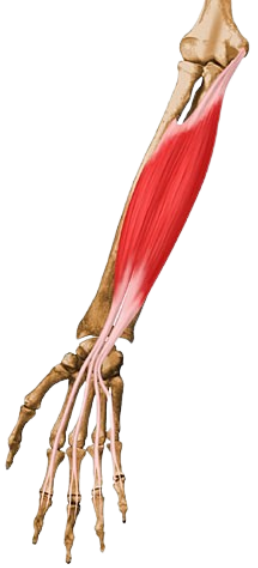
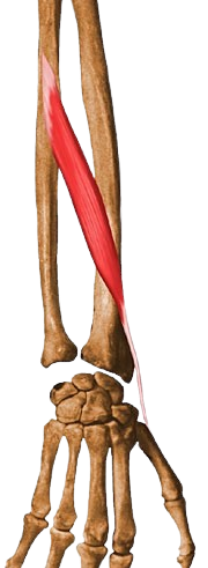
Function: Works on the fingers (helps to bend them)
Belly of the muscle: Inner side of the forearm
Function: Primarily works on wrist, bending it forward (radial side)
Belly of the muscle: Inner side of the forearm, near the thumb
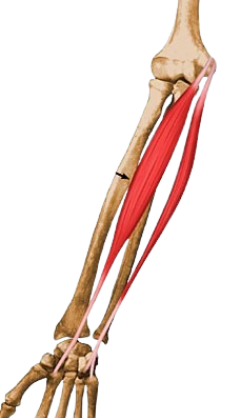
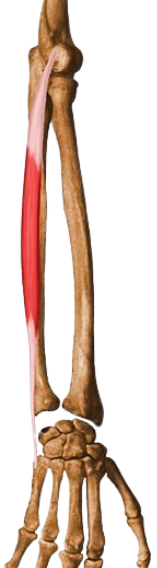
Function: Extends the fingers and helps straighten the wrist
Belly of the muscle: Back side of the forearm

Function: Works on the wrist, helping to extend it and move it towards the ularnis
Belly of the muscle: Outer side of the forearm, near the pinky
Function: Moves the thumb away from the palm and helps with wrist movements (radial side)
Belly of the muscle: Outer side of the forearm, near the pinky
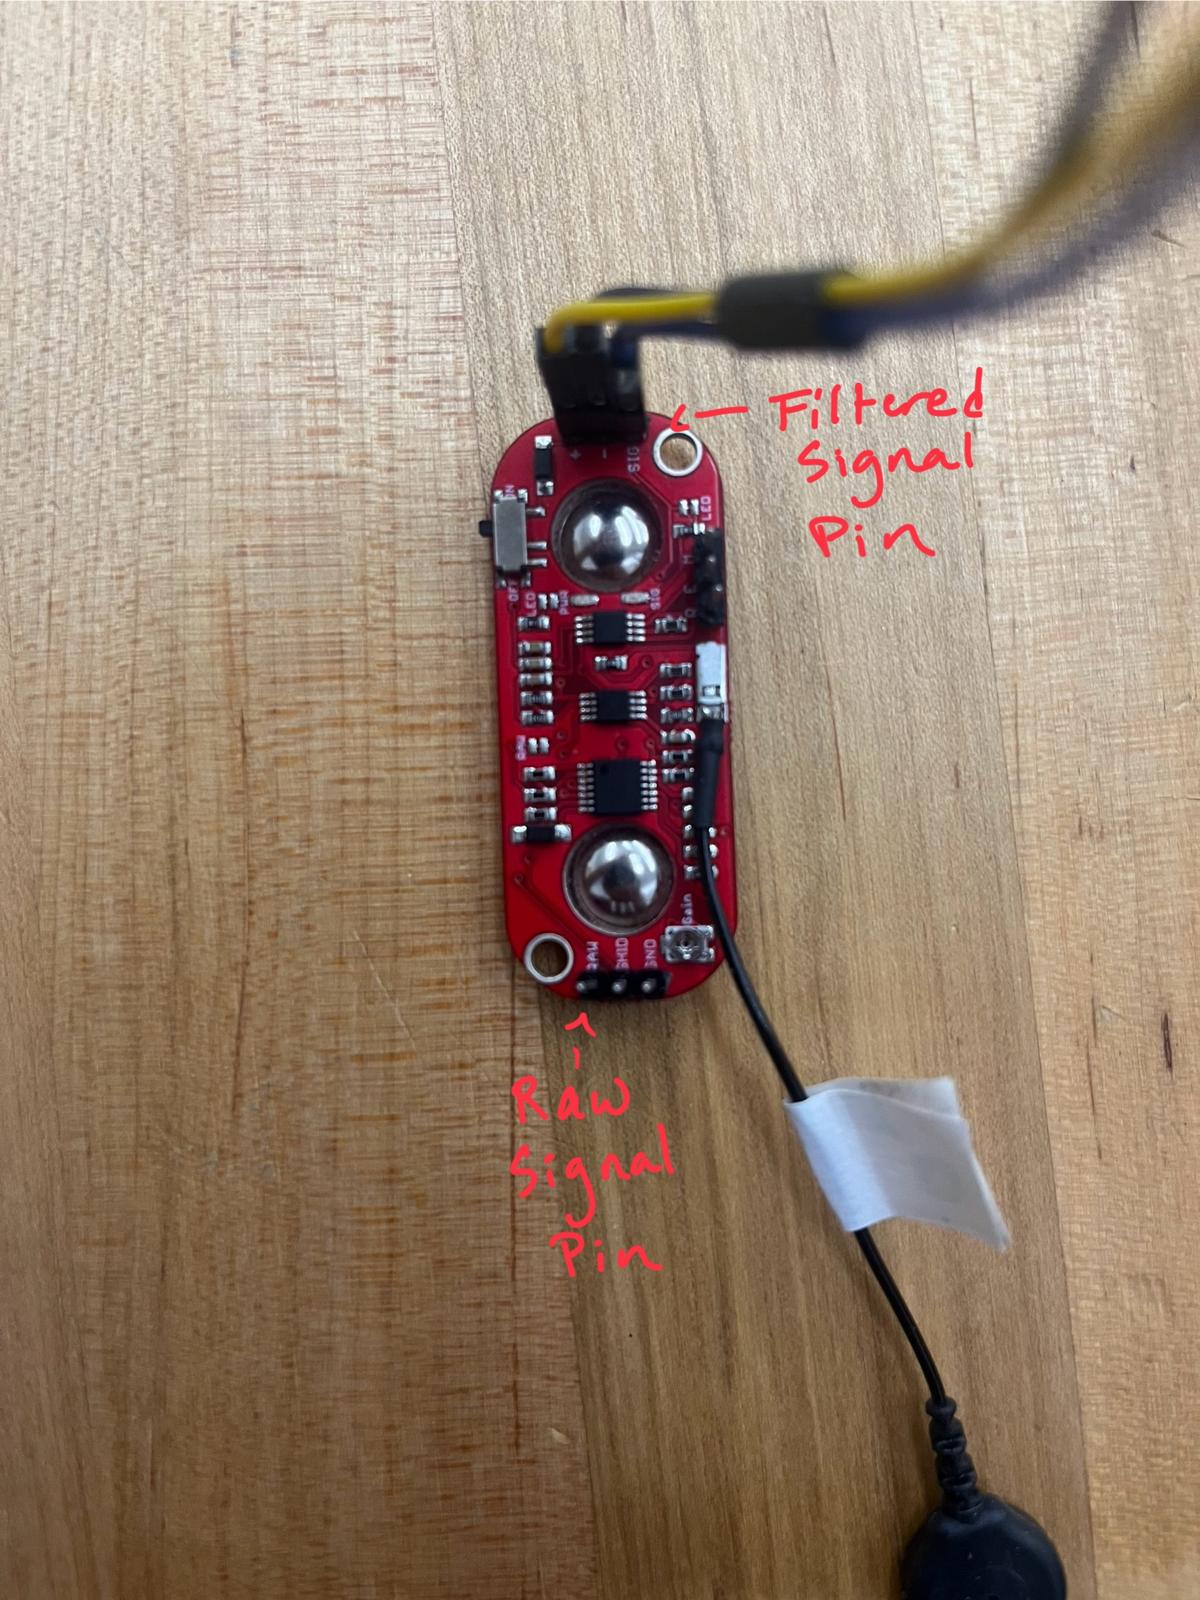
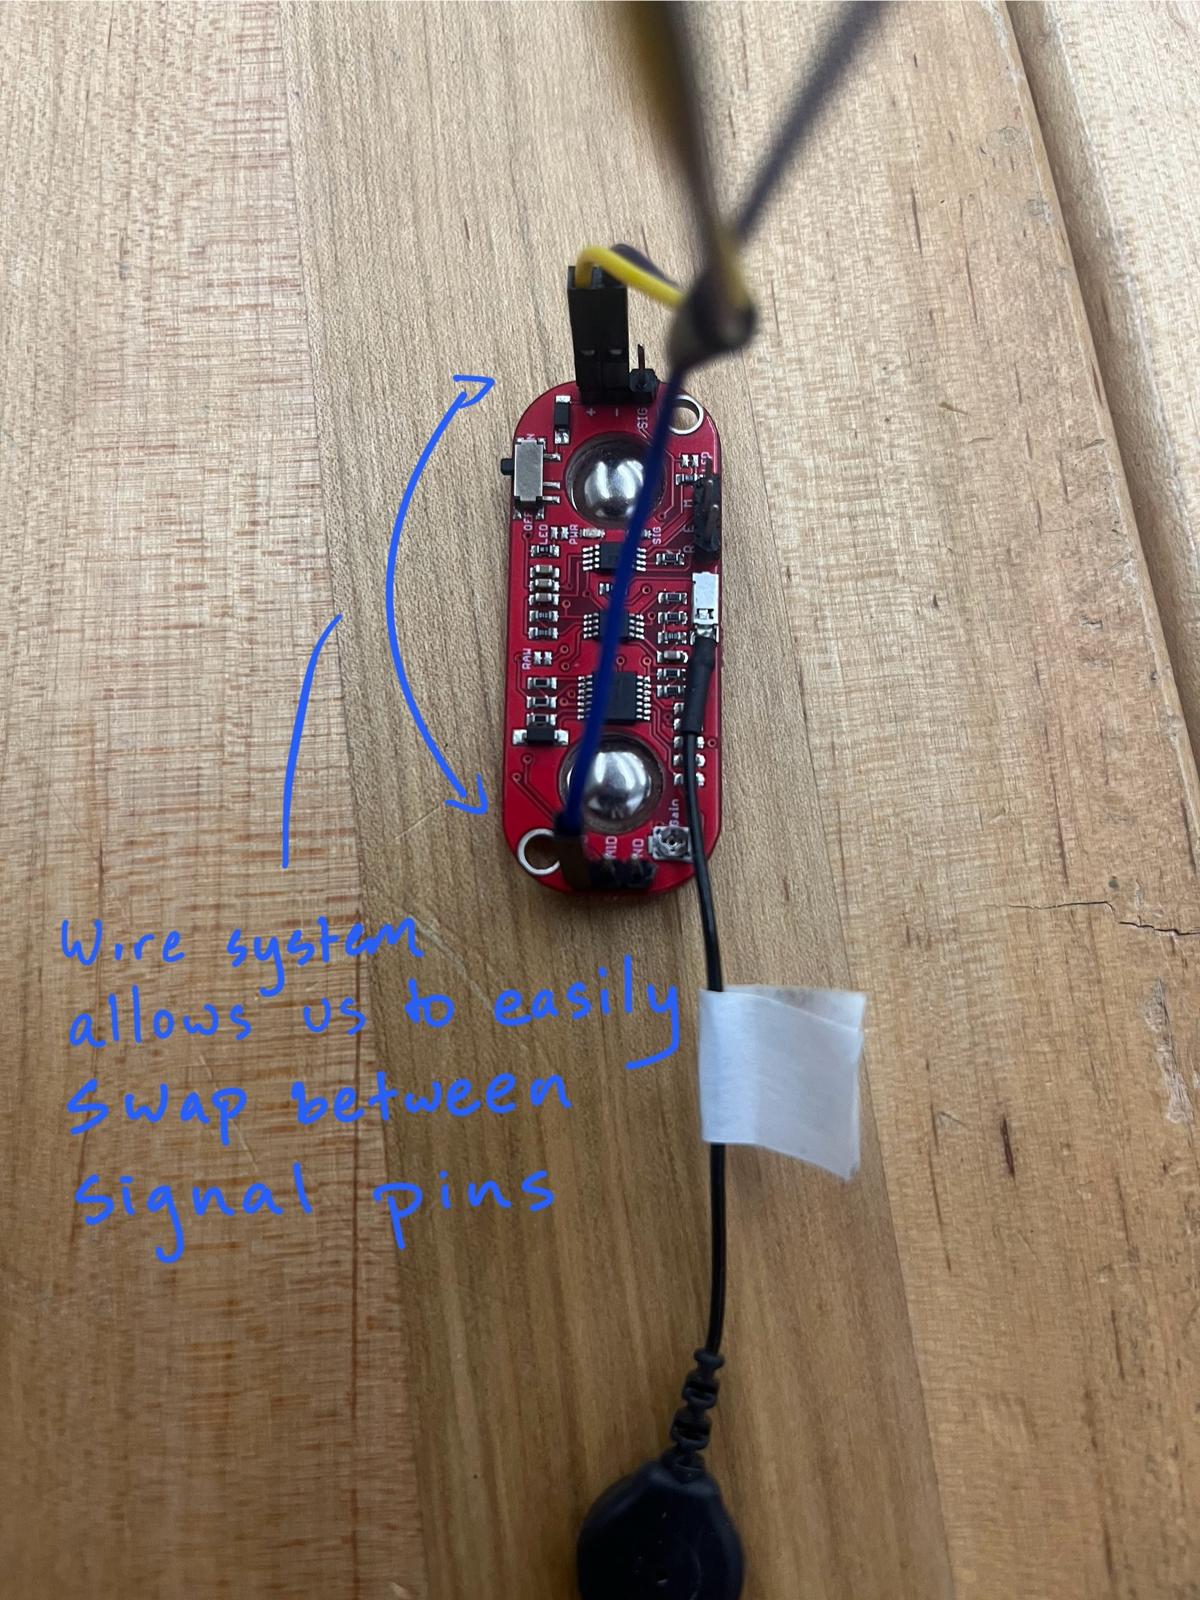
To the left are images displaying the different pins we can use to collect data from the sensors.
This site was created with the Nicepage